Campervans, Motor vehicles, Body Repair and Modifications including Jig Making, Panel making and Spray Painting with an introduction to the tools required and trade notes
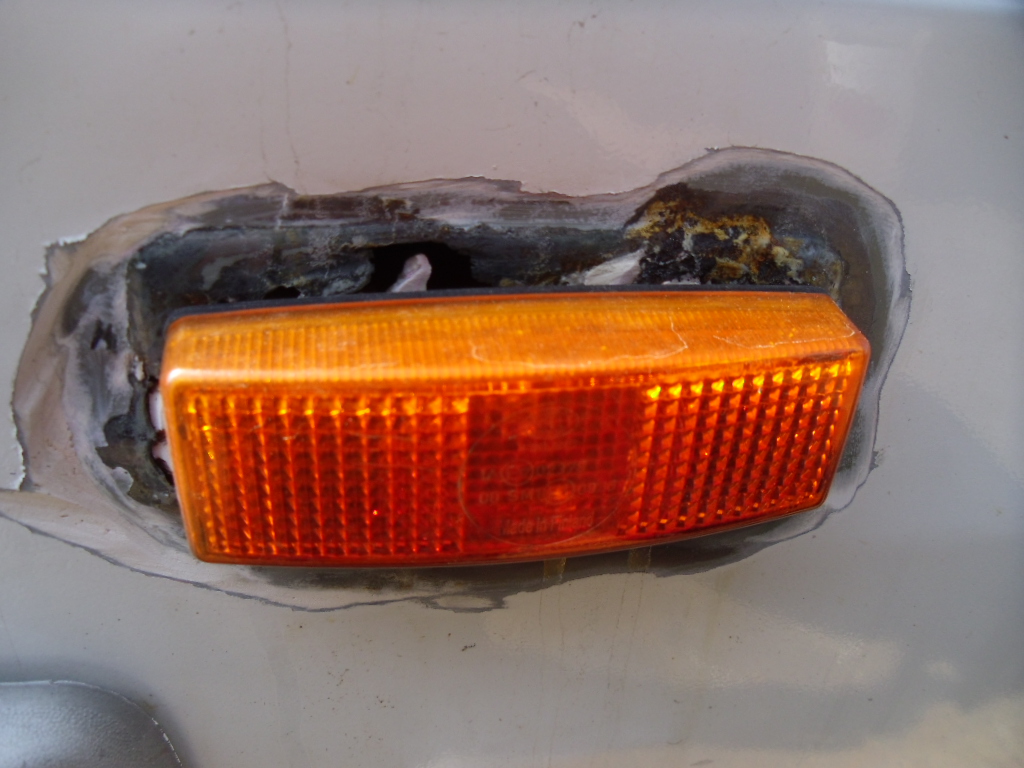
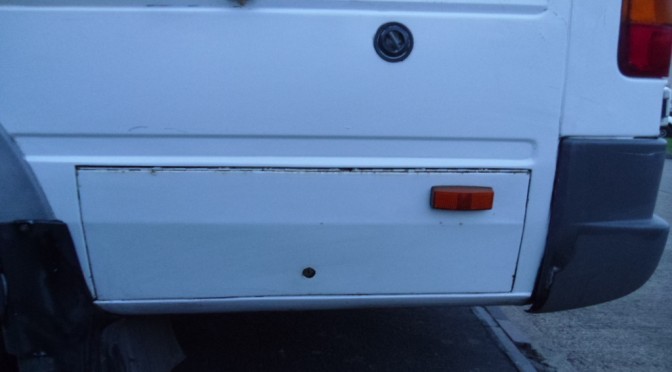
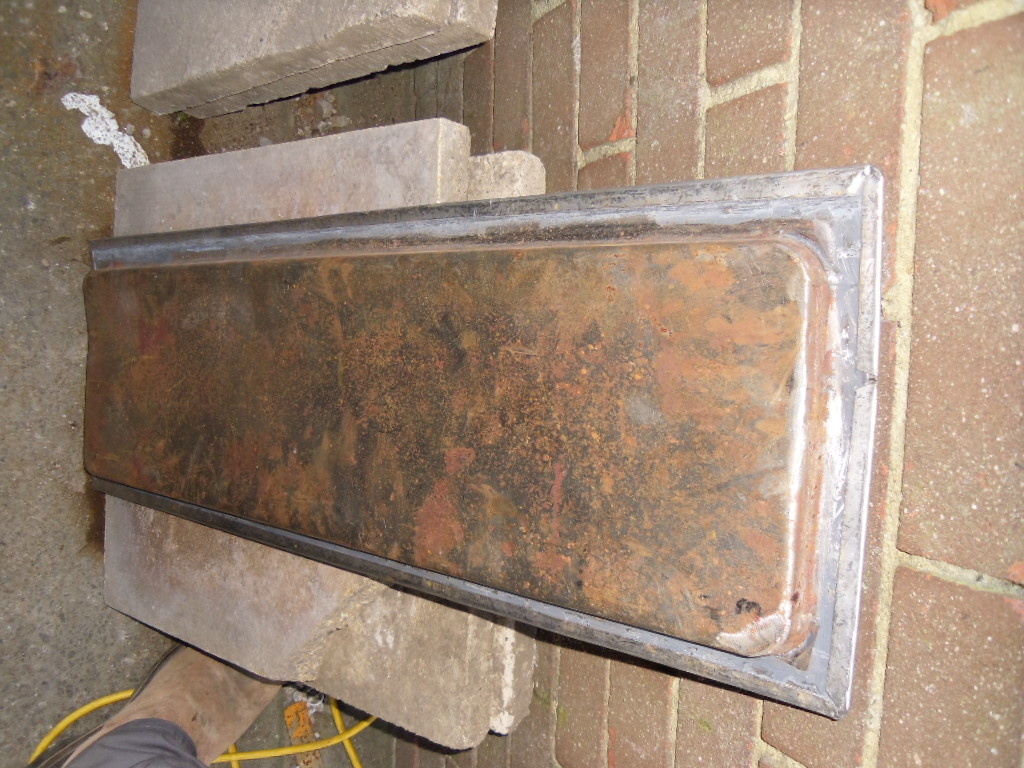
I’ve decide to start this post because I was refurbishing my campervan after the winter layup and I had to repair the area around one of my running lights.
See what I mean!
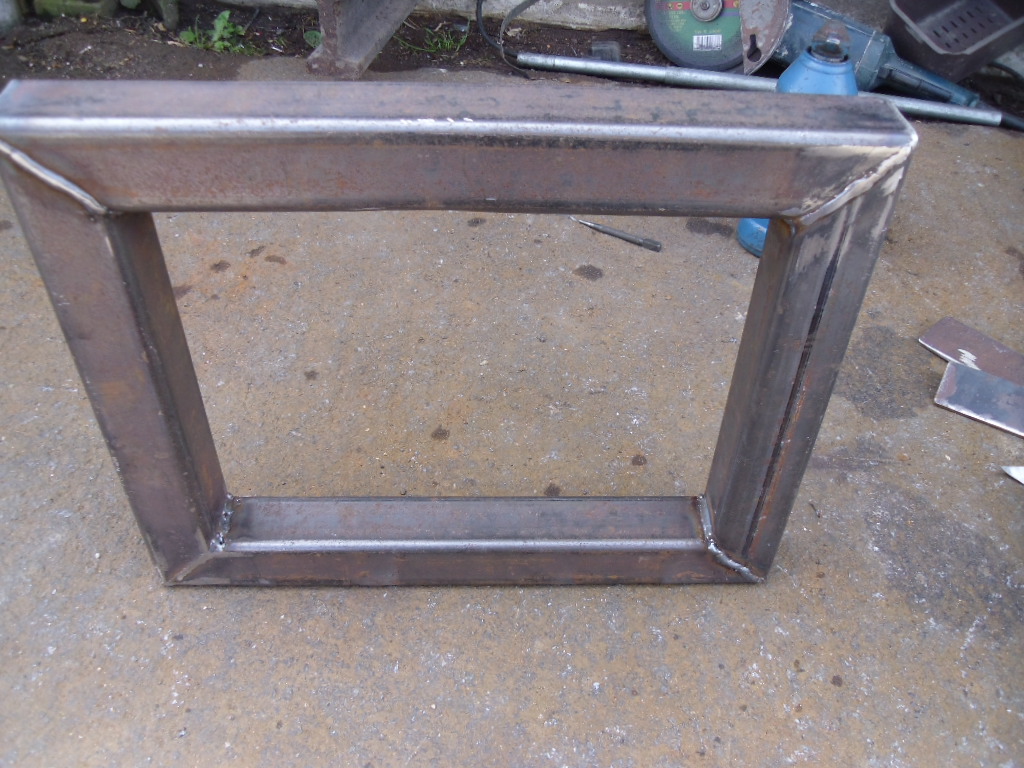
Basically, the lamp is mounted on a rectangular raised area in the lower half of the vehicle body. Because of its simple shape I felt it was an ideal time to introduce you all to what I call the “picture frame”.
This is just a rectangular frame of 3mm box section 3cm square. I won’t go into the size of the frame because it’s generic and you’ll make your frames the size you need once you understand the principle. Next you’ll need a stand to make it upright:
.
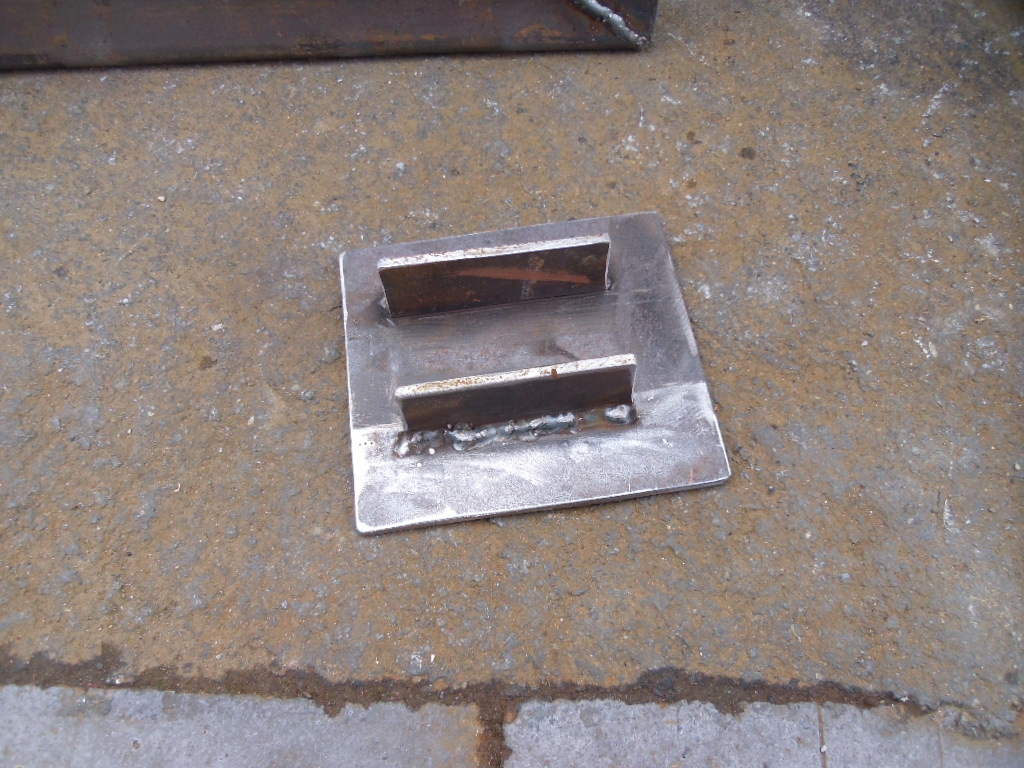
A simple bracket will suffice but it needs to be at least 2,5mm plate. Next you need a working platform
also in 2.5mm plate
.
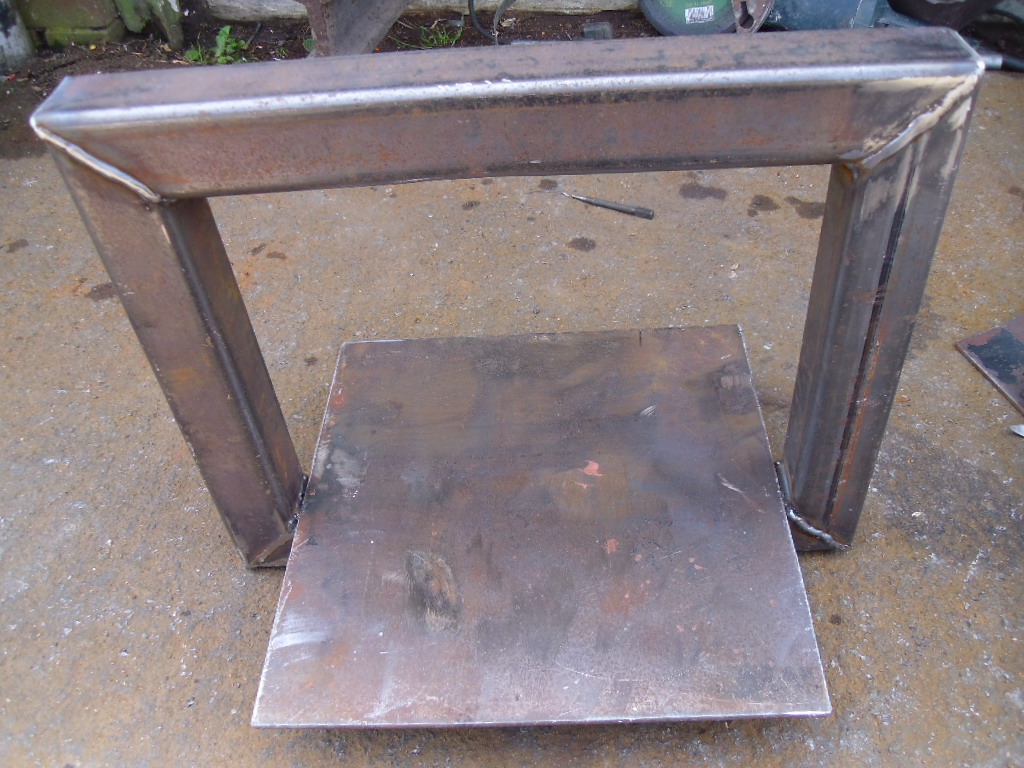
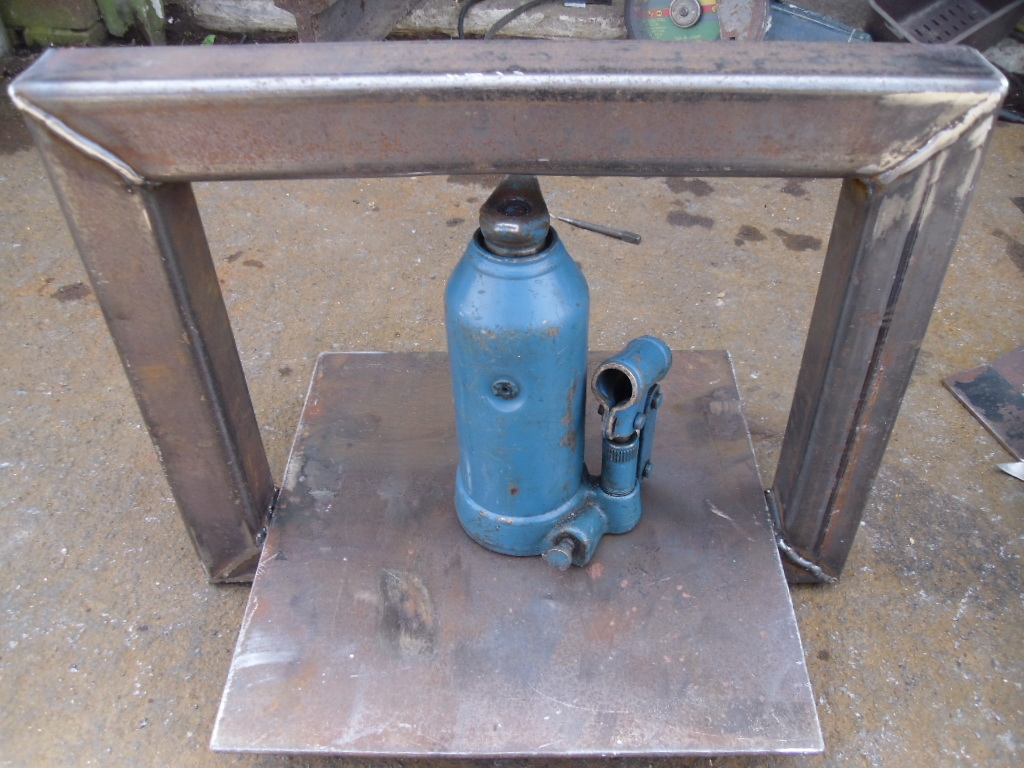
This is the complete assembly. Please remember when building your “picture frame” that the hydraulic ram or rams you will be using (a simple bottle jack that may come with your vehicle, or can be purchased quite cheaply-you only need about 6 tons to operate your press) push in both directions so you might have to reinforce the top with another plate similar to the base stand.
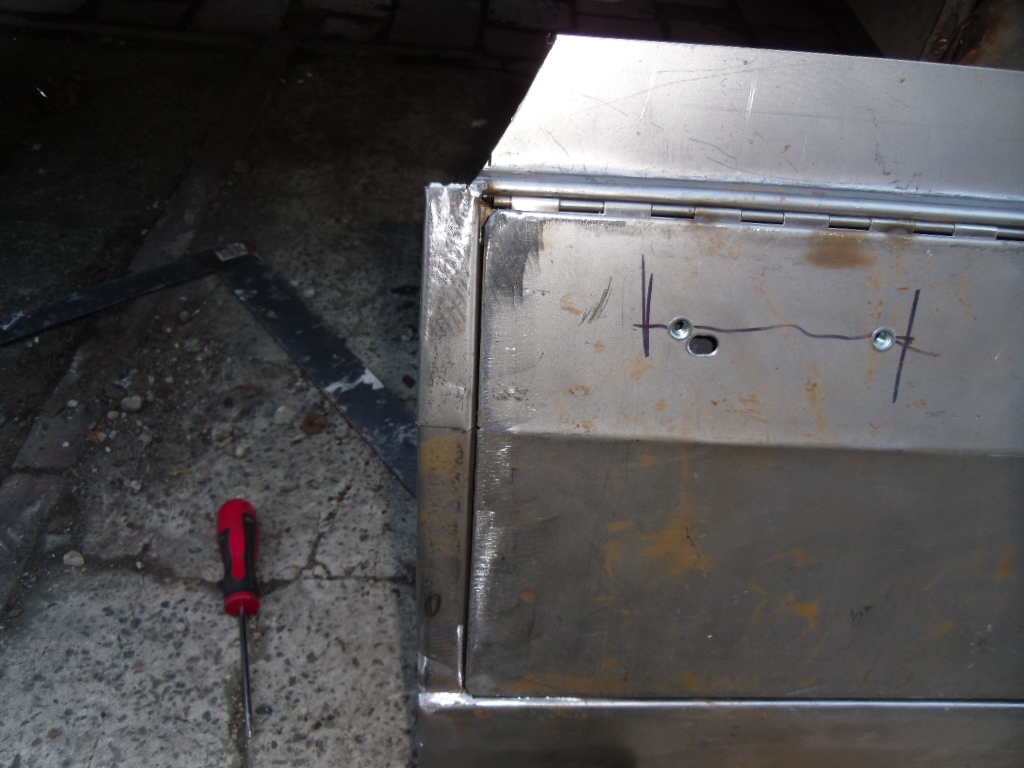
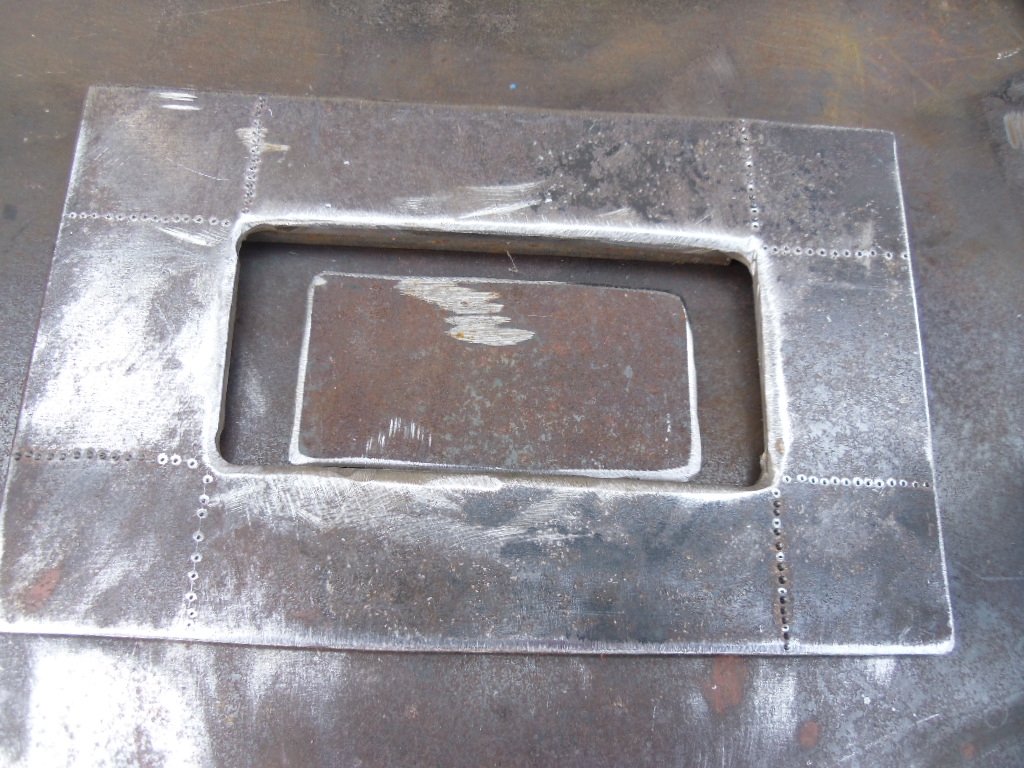
This is the completed assembly. All we need now is the two parts of our press tool. One has to be a male fitting and the other a female. This is the male fitting a simple rectangle of steel plate which needs to be as thick as the raised section of the panel. Fortunately my 2.5mm plate was ideal. You don’t need complicated oxy~acetylene equipment to cut the steel plate. An angle grinder fitted with a thin cutting disc will do the job just fine. Don’t forget the safety goggles and leather gloves and this might be just the time to invest in a chrome leather apron. I have seen many an expensive set of flameproof overalls ruined with the sparks from an angle grinder. Then we need to make the female part of the press tool. Note the centre punch marks to locate the male tool after the sheet is laid in position.
Just to show you how big you can go with the picture frame I’ve enclosed some pictures fron my ‘How to make a Landrover Rear Floor panel’ as yet to be written post: Note the reinforcing across the top of the picture frame
This time I’m going to give you some advice about obtaining tools for pennies.
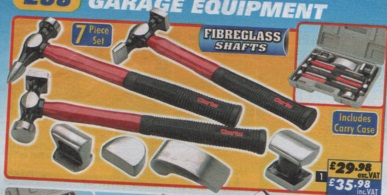
If you are new to panelbeating and spraying you won’t know what tools you need and what they look like. I’ve copied some pictures from the Machine Mart Catalogue to give you an idea what’s out there and how much they cost new:
The first set is the cheapest but fibre glass shafts can break without warning whilst the second has hickory shafts which are the better option.
Snap On, Mac Tools, Sealey, all sell panel beating tools but as the quality improves so does the price.
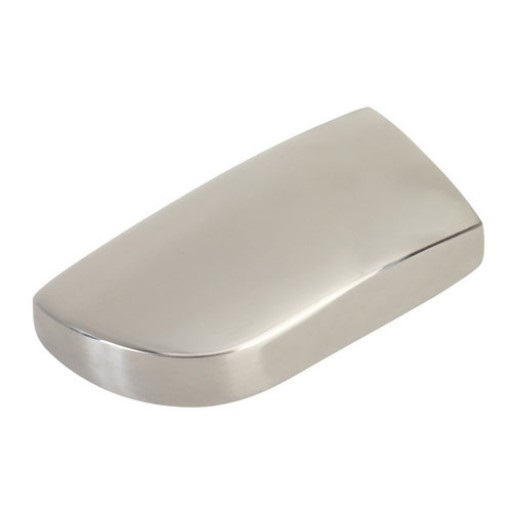
The dollies you can see are the ‘Comma’ dolly, ‘Heel’ dolly, ‘General Purpose ‘dolly and ‘Utility’ dolly. What they don’t show you is the most used ‘Toe’ dolly, and at this stage all you will need is a Pick and Finishing Hammer(that’s the one with a point at one end)and a ‘Toe Dolly’:
Unfortunately, and as an indicator of its usefulness, Machine Mart don’t sell one and the cheapest on the internet is around £20 – £30.
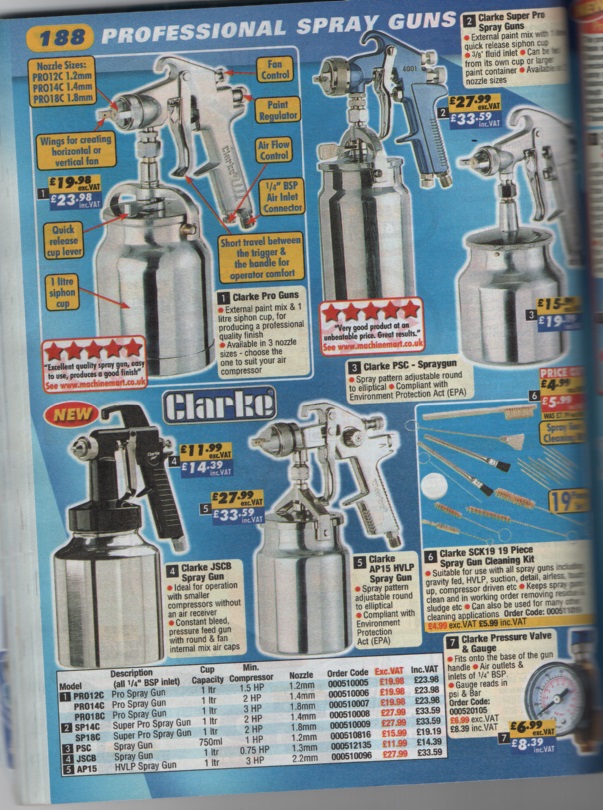
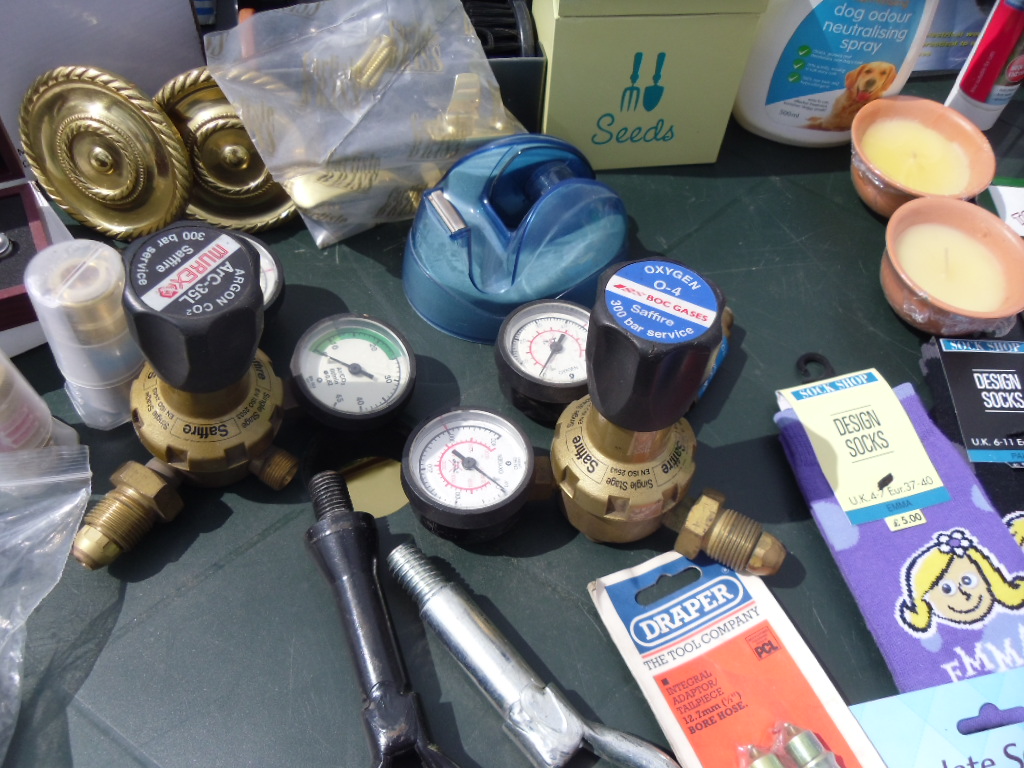
Spray Guns abound and I’ve included a page from the Machine Mart catalogue to show you a few of the choices:
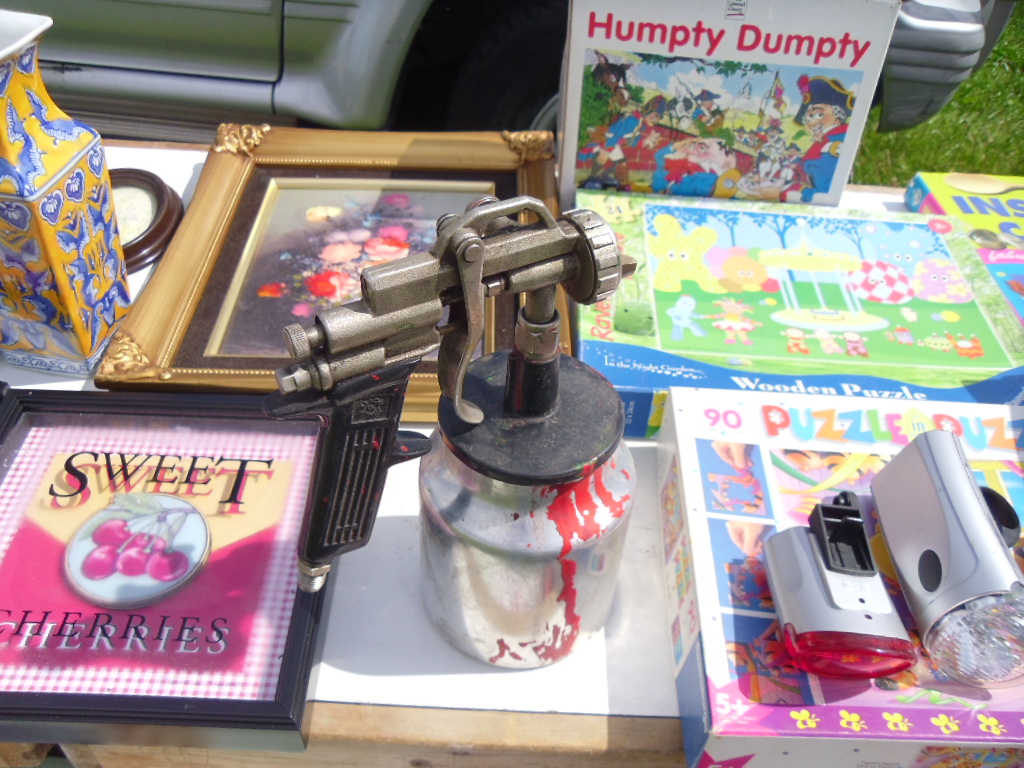
You can just about make out the prices of between £20 – £30, however, I spotted this at a car boot sale just recently:
It was spotlessly clean and was going for a fiver.
Which brings me back to the point of this blog – toolkits for pennies.
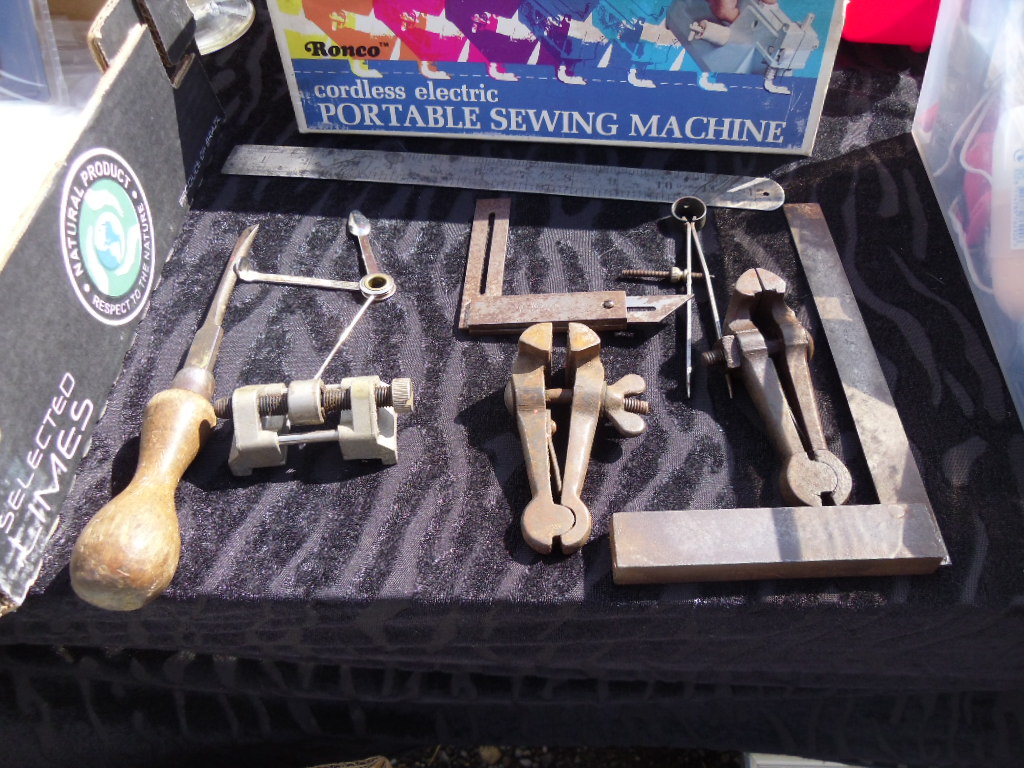
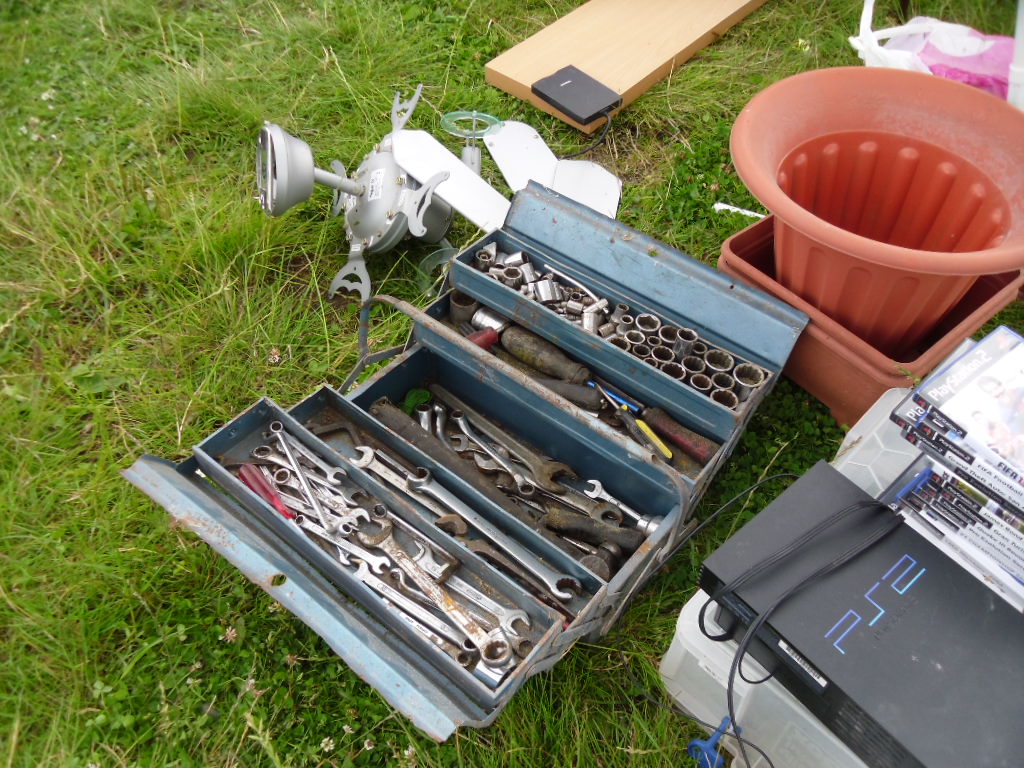
Car Boot sales, Yard sales, Jumble sales, auctions all sell assorted boxes of tools. As an example:
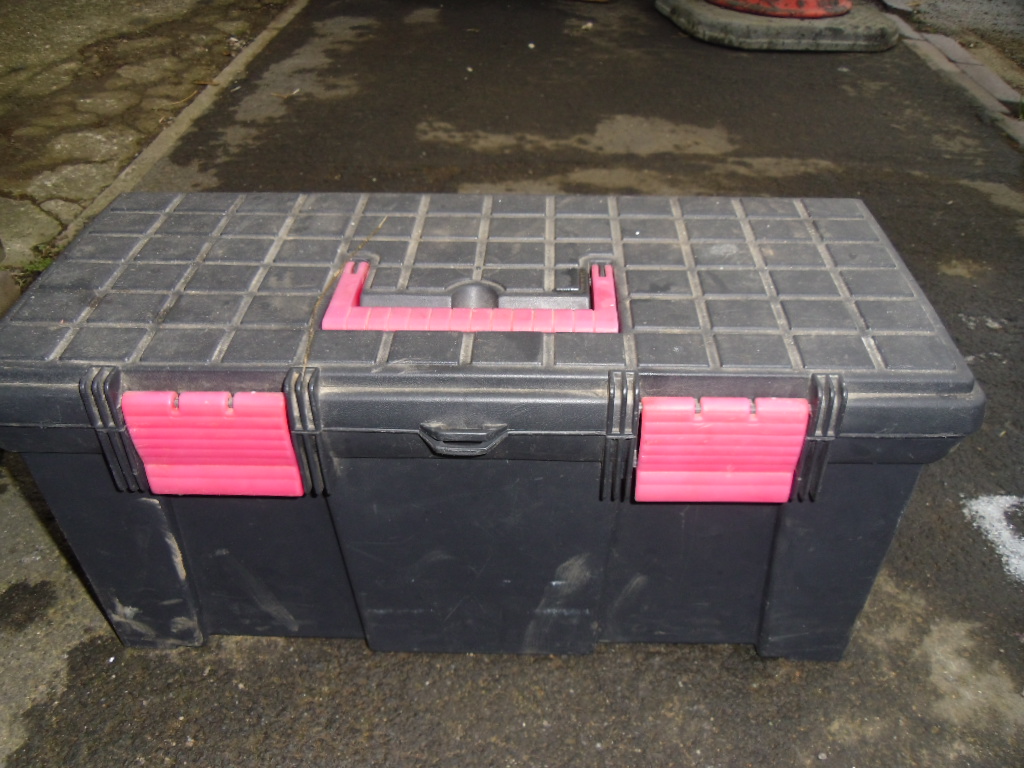
The first thing you must have is a toolbox. There are many sorts of toolboxes but as this is the about saving money I’m going to start with the most basic –
The Plastic Toolbox
This type of toolbox can be purchased new for about £6 – £10 depending on size and sometimes comes with an interior tray.
Then there’s the cantilever toolbox. This one seen at a car boot sale even comes with a set of tools:
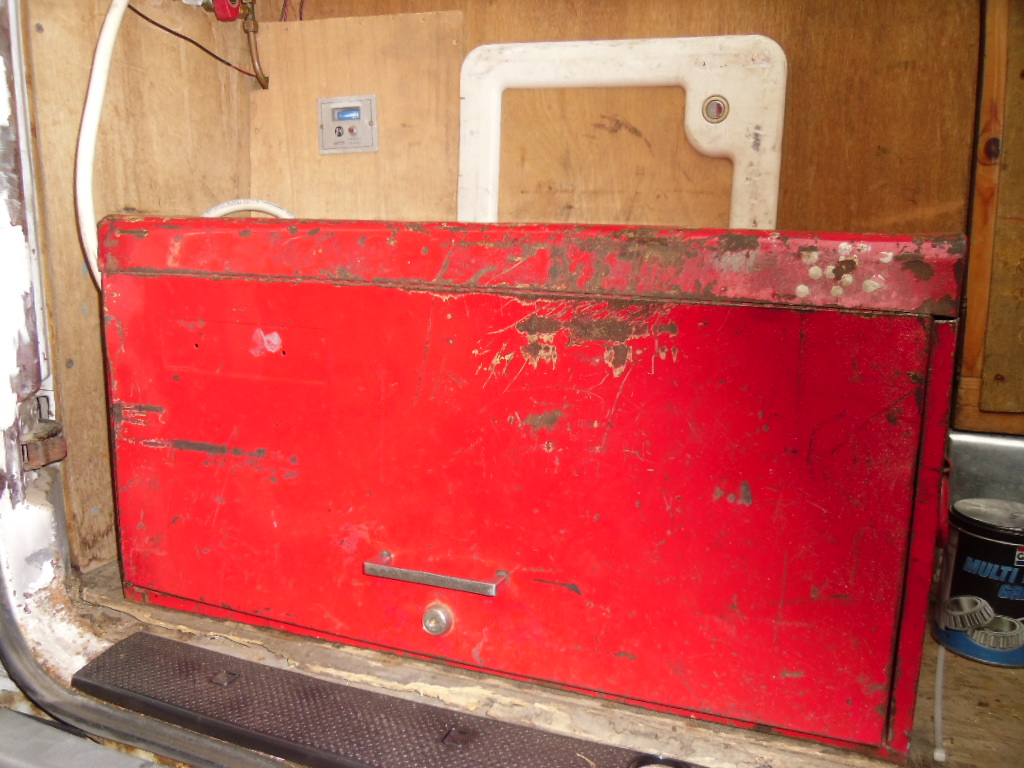
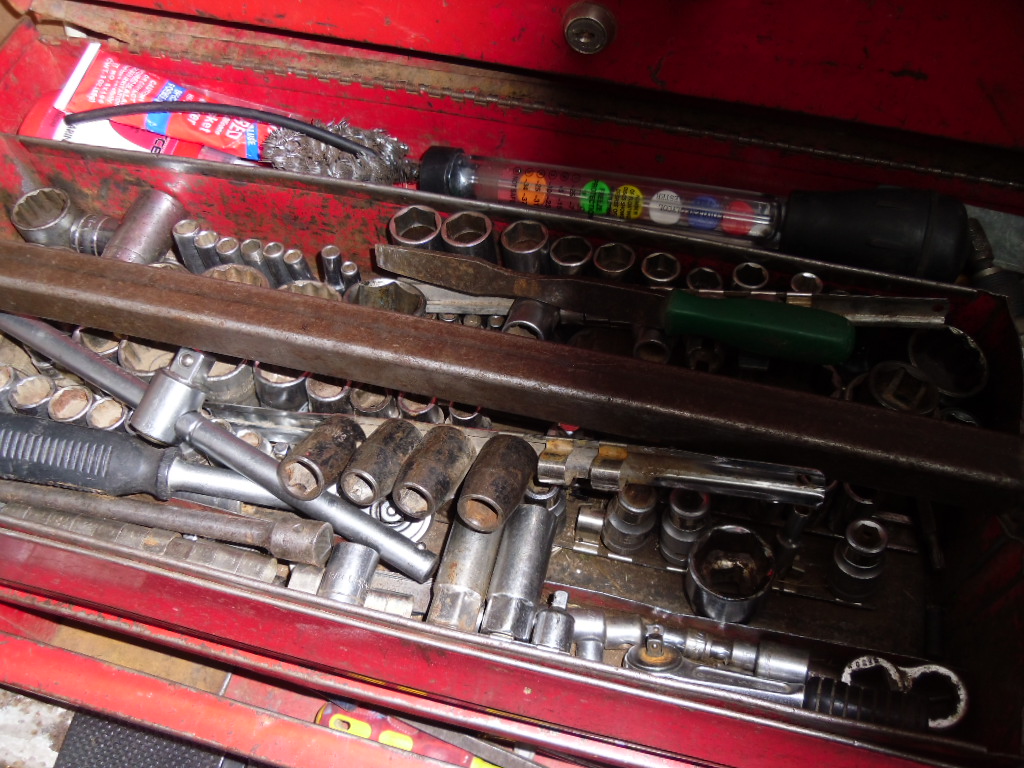
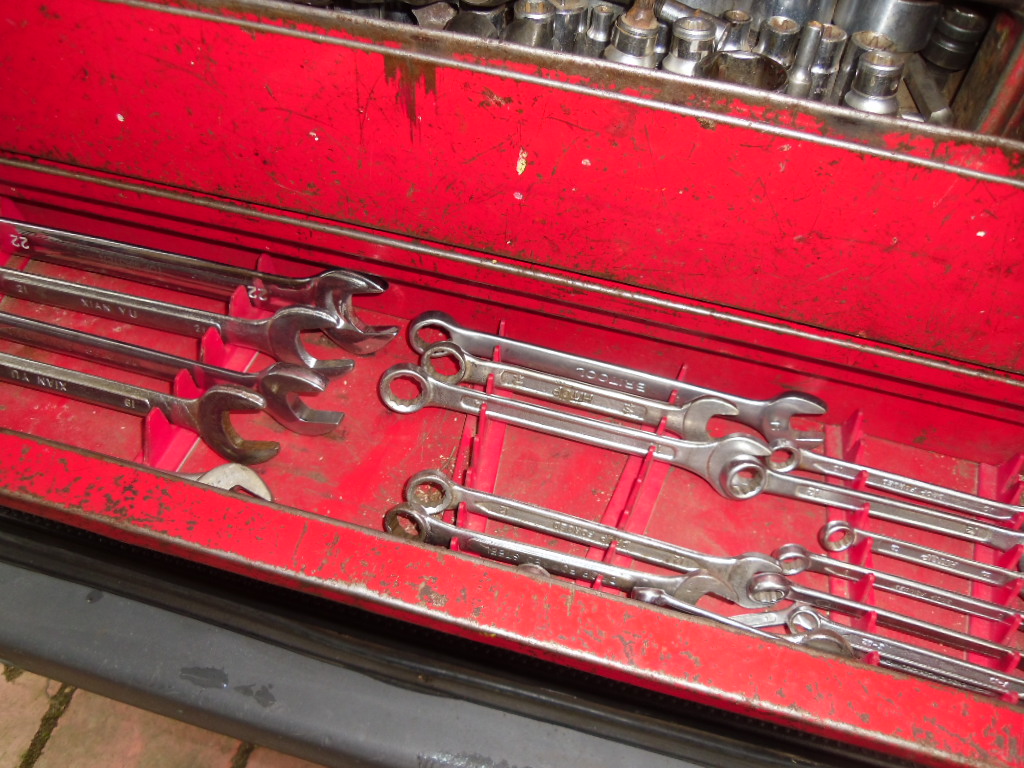
This is my Snap on Top Box I bought new 30 years ago at a price that would make your eyes water even today, but I was offered one the other day at an auction for less than £100. You’ll see cheaper versions around with the same features, a lift up lid and front with drawers inside and a tool tray:
A lockable box is a good start.
The basic point of all this is you can get tools for next to nothing but you have to know what you’re looking for and what you are going to need. If you see a toe dolly at a car boot sale be prepared to pay at least a fiver for it but you could get it for a song. Spray guns should cost no more than a few pounds unless they are Devilbiss, which are quality.
If you are going to be spraying then you’ll need a compressor. I saw an excellent compressor at Aldi a few weeks ago. It produced 9cfm(cubic foot a minute) priced under £90. You’ll need at least 6cfm for spraying or air tools. A bargain as it came with an air line and a few tools.
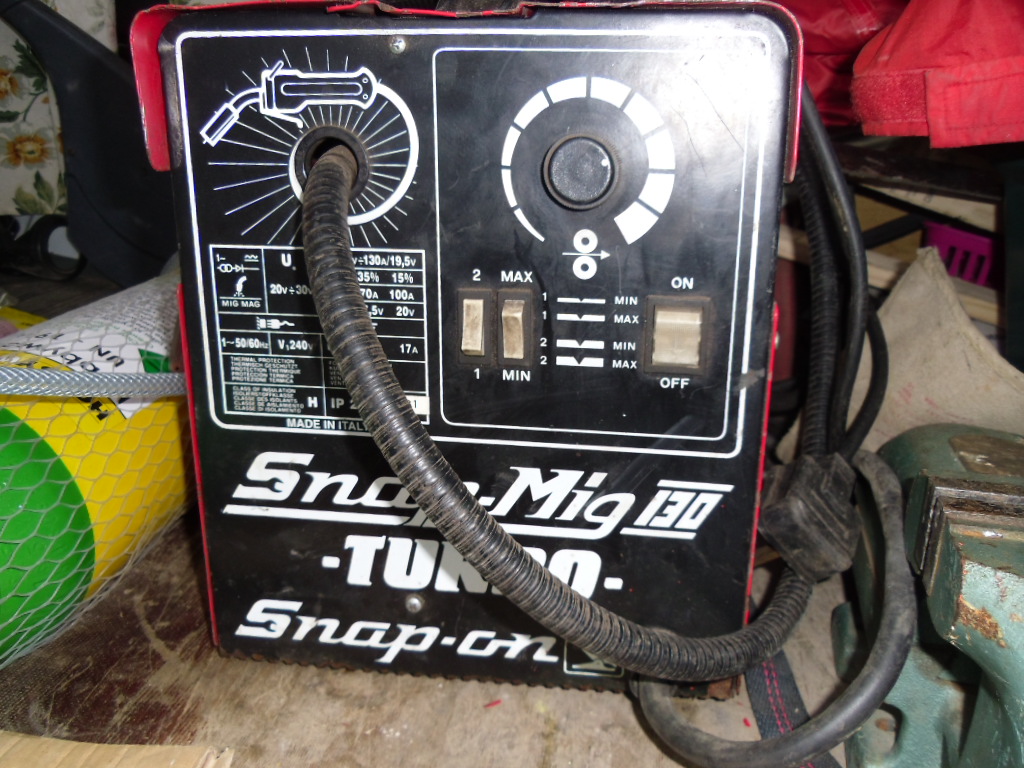
I purchased a Mig Welder at auction a few weeks ago for £50:
Yes, it was a Snap On. After some TLC, a new liner, earth cable and a few bits and pieces it is working well. I shudder to think what it cost new but it had reached the stage where it was unusable to its previous owner. Look for bargains like this but only if they are within your capacity to fix what’s wrong, or if you have a mate that can!!
Pliers, snips, hammers, files, the list is endless but the golden rule is look for a makers name. If it was made in Germany or Sheffield it should be good even if it has been abused; chisels can be resharpened, as can drills and screwdrivers. Old tools are priceless because you can’t get quality new tools nowadays without paying a fortune for them. There’s a lot of mass produced rubbish out there that isn’t worth owning.
As my blog develops I will be introducing you to the different sorts of tools you will need and how to use them. Start going to car boot sales now and get that toolbox. You’ll need it.
OK, so you’ve got a camper or van and you want to put a storage locker, or lockers, in the side below the floor. I’m going to show you how to make the locker door and its surround. The actual locker itself I would make of galvanised 18 gauge steel folded and rivetted together. As the basic techniques involved in folding metal are covered here I will not go over them again as the locker itself will vary from vehicle to vehicle, as will personal preferences as to sizes and usage.
Health and Safety
Cutting grinding and welding metal will introduce us to hazards that require the saner individuals amongst us to use safety equipment and techniques that minimise those risks. Goggles to protect the eyes, gloves to protect the hands, welding helmets to protect the eyes from glare and the skin on our faces from the UV radiation emitted by mig/tig welders, overalls to protect our clothing and our loved ones from the dangerous materials absorbed and covering them from our dirty work and leather boots with steel toecaps and oil resistant soles. Not only protecting our bodies from hazards but also protecting us from an angry partner if we keep them on in the house and soil the carpets from oil and rip them with iron filings and swarf embedded in the soles of our boots. Get the idea! Wear safety equipment appropriate to the risks, remove them when not needed or where they are a hazard to others.
Let’s make a list of most of the tools and equipment we’ll need:
Small Angle Grinder
Mild Steel 18 and 20 gauge
Pick and Finishing Hammer
A stainless piano hinge
Toe Dolly
A Lock
Wooden Mallet
Aviation Snips/Gilboes/Tinsnips
Angle Iron
Tape Measure
Pencil/Fine Point felt tip pen
Nutsert Tool
A Straight edge or ruler 1m long
Hole Cutter
Welder
Zinc Primer & Paintbrush
The next thing we have to do is decide where the locker is going to go.
Will the panel you are going to make fit over or under or just up to the adjacent panel. Can you use a natural swage line, or panel join It’s worth mentioning at this stage to check behind where your door is going to go to make sure you have enough room to make a locker that is worth the effort. Whilst I had a natural space behind my N/S/R(Near side rear) quarter panel that was just the right size for an LPG tank, the other side had an exhaust pipe running through it. Luckily, later models of Sprinter have a much shorter exhaust so it was acceptable to shorten mine by about six feet giving me enough space for an acceptable tool locker.
I decided to put mine behind the rear wheel. As this is one I prepared earlier and have used as an LPG locker I’m going to make one for the other side.
Using our felt tip pen, we have to mark on the vehicle the position of the locker.
Once done we can measure our new locker door.
Making The Door Skin
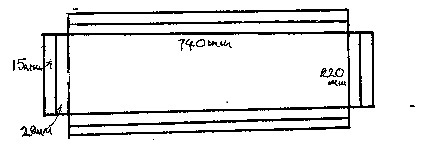
Now we have to transfer these details to our sheet of 20 gauge steel.
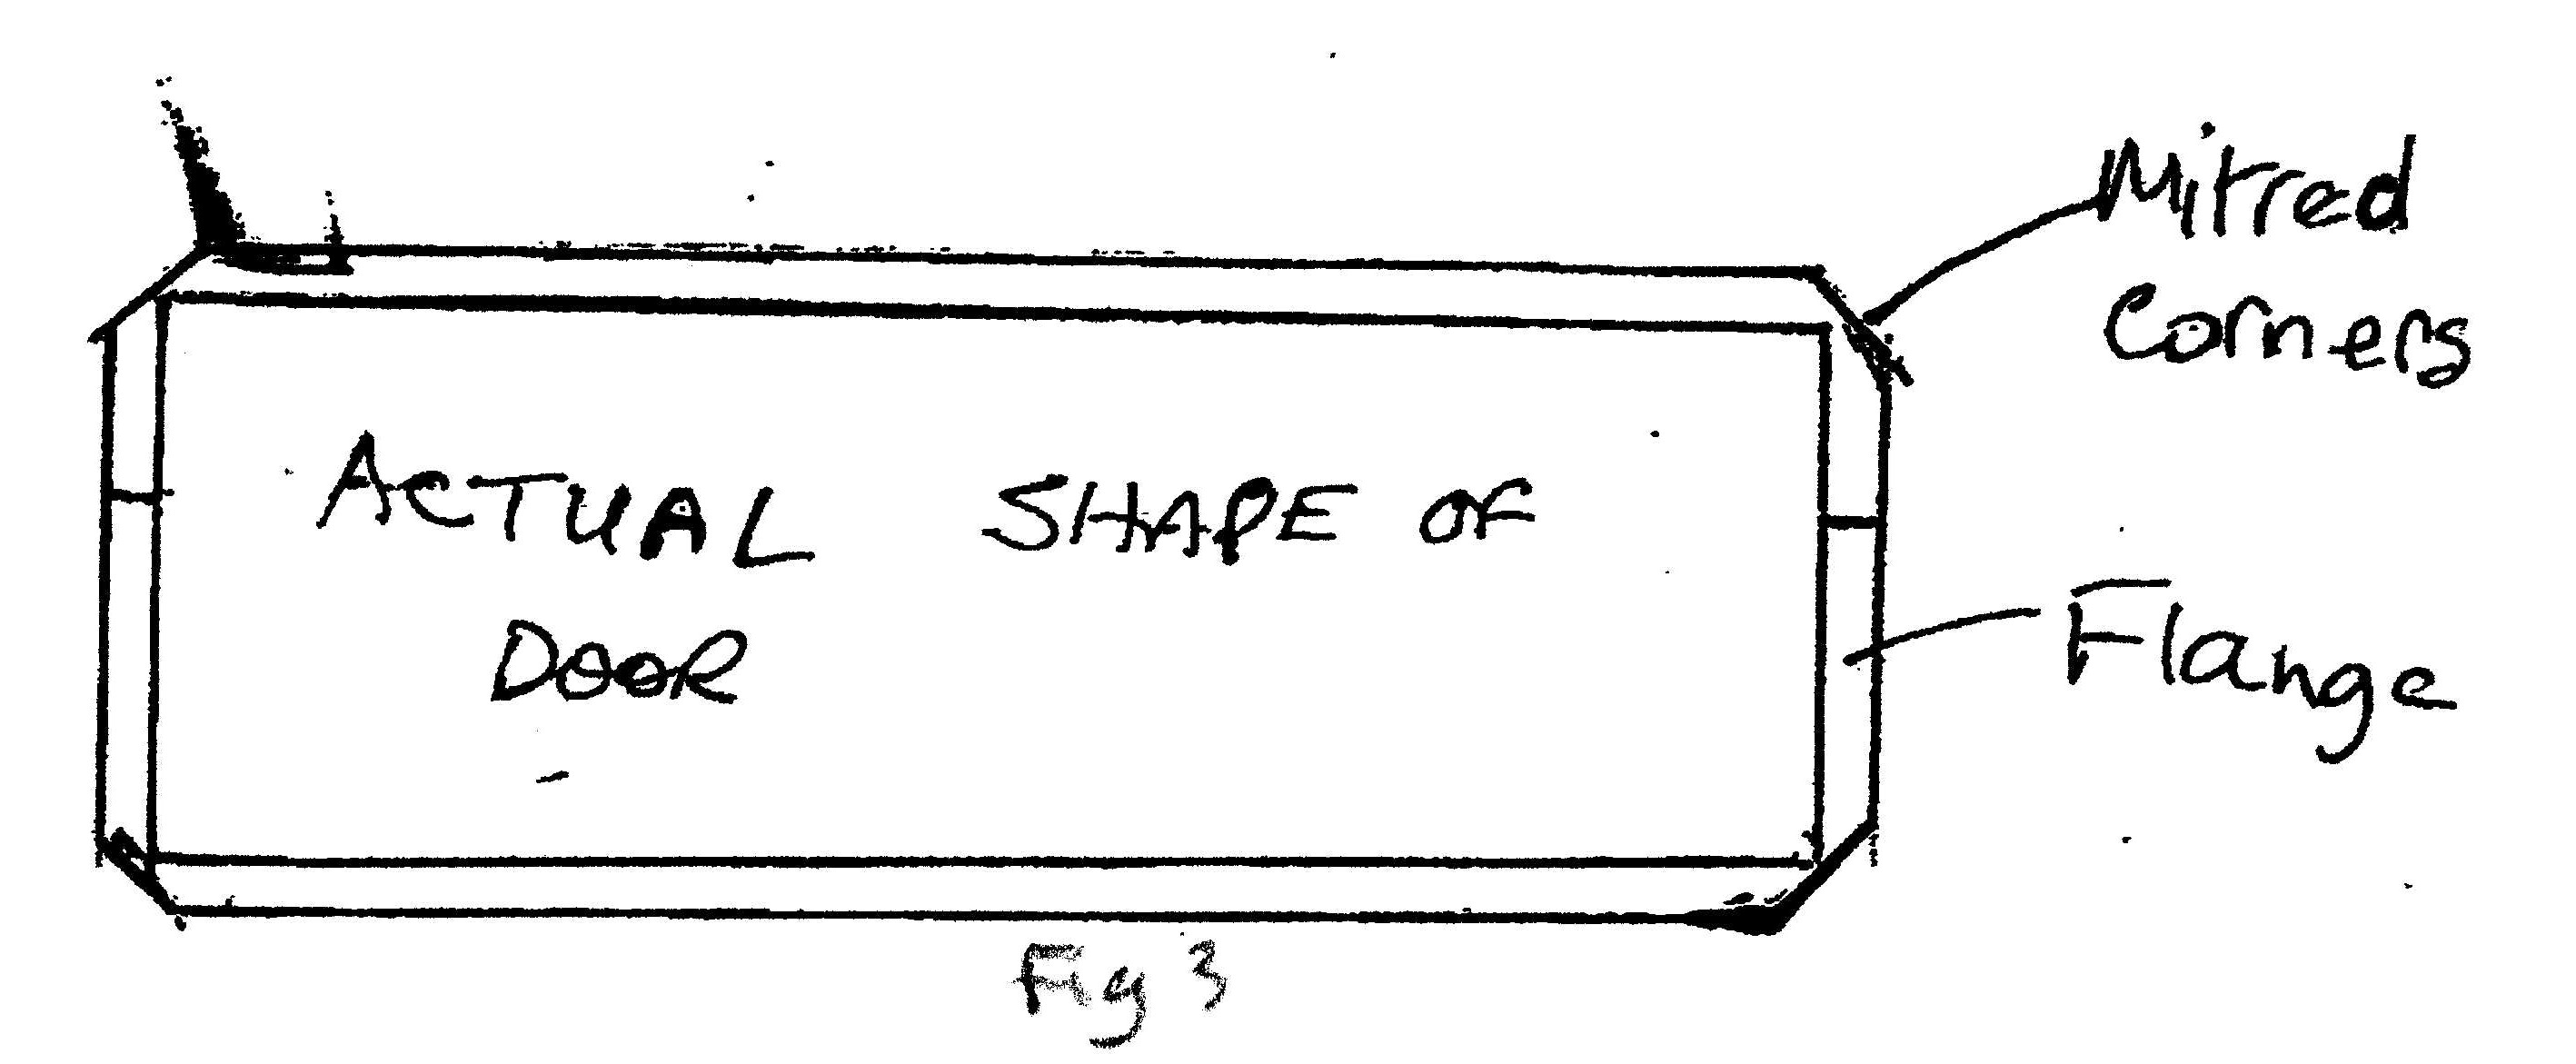
My door skin skin is 790 mm long , 260mm high at the front and 255mm high at the rear plus a 15mm depth of flange on all sides with mitred corners. Yours will be whatever size you want it to be and whatever shape depending on where you put it and on what vehicle. It’s worth investing in a pair of aviation snips, Left and Right handed, as they have an undercut lower jaw that allows you to cut sheet metal without distortion.
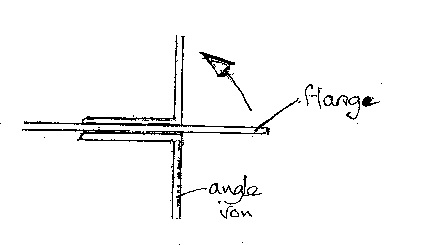
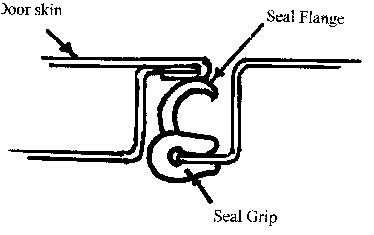
What we have to bear in mind is this is the basic shape we are starting with. From this comes the shape of the door skin. For those who don’t know, a door skin has a wrap around flange crimped on to a door shell.
Once we have cut out the door skin in 20 gauge steel we need to bend the flange to 90 degrees. . If you haven’t got a folding machine you will need to get hold of some robust angle iron. I started with an old bed frame cut to size and clamped together with G clamps
Cut one length of angle iron for the longest side with four others the same lengths as each side of the door skin . Clamp them one at a time with G Clamps where you want the fold to be and, using a wooden mallet or soft faced hammer, dress the flange over at right angles. If you use a steel faced hammer you need to take extra care not to stretch the metal of the flange as it will curve your door skin. As indicated on the “actual shape of the door” drawing there are two small cuts to the shorter flanges. This is where there is a swage in my vehicle body shape. If you need to make a bend in the skin for the same reason place one of the long pieces of angle iron on its two edges with the corner uppermost against the inside of the skin with the ends aligned with the cuts in the flanges and gently put your weight evenly on the two outer edges, if necessary spreading the load evenly with some pieces of wood. This should have the effect of making a gentle fold in the door skin and not a sharp line.Ok, that’s my basic door skin made.
Making The Door Frame:
My door frame had to be slightly tapered because of the shape of the van panel. If you look at a car door you can see the door frame is like a big box, holding all the door bits, glass, winder mechanisms and locks inside it.
The one thing that dictated the thickness of my door ‘frame’ was the depth of my lock barrel. I wanted to bolt the lock to the inside of the frame with the face of the barrel flush with the outside of the door skin. This necessitated the thickness of the door frame to be 20mm.
There are many makes of locks and using these generic instructions you can fit your own lock in your own way.
From the original dimensions of the door deduct 40mm in total from each face, giving you the basic box dimensions, then add 20mm to each side as shown, finally adding 15mm as the final flange. Fold it with the angle iron as you did the door skin but remember to fold the outer flanges first with the angle iron cut to the length of the flange. As you can see, the final result after folding will give us the same shape we had before but 5mm shorter all round and will give us a three dimensional box 20mm thick with a 15mm flange. This will give you a flanged box with the corners missing. Should you be fitting this to a Sprinter you will need to make a fold to accommodate the body shape as you did on the door skin.
We can also round off the corners of the flanged box. We do this by :
Rust Protection:
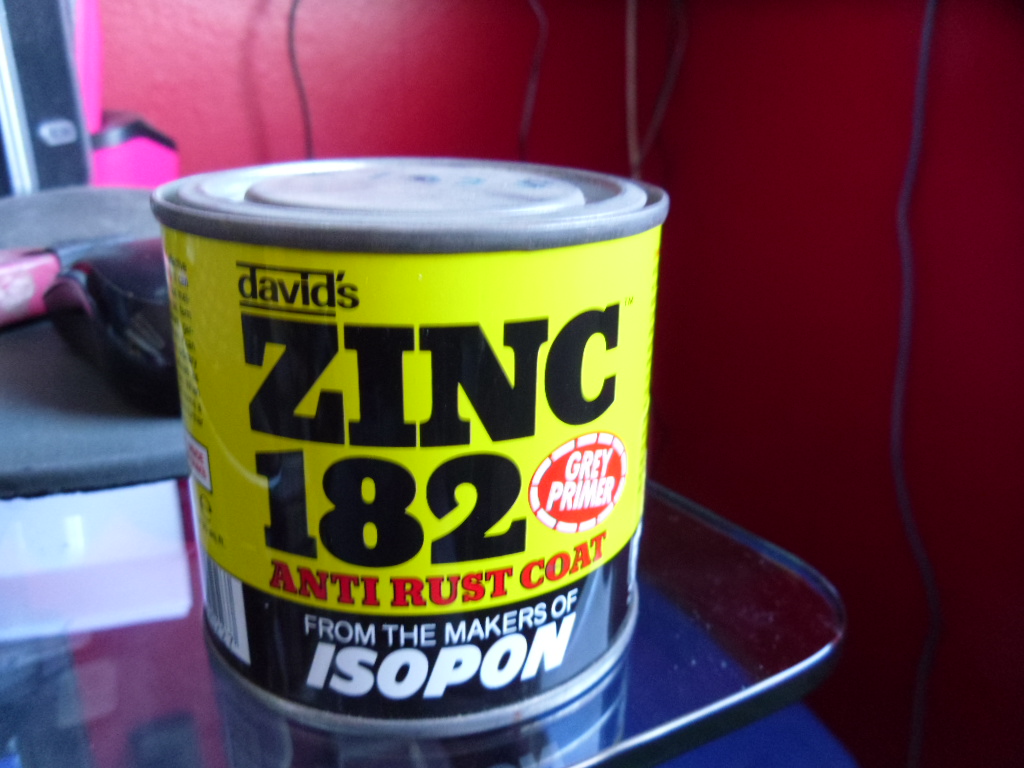
Next we have to rust protect the inner surfaces of our door skin and door frame. For this we need a zinc based primer like David’s ZINC 182. Just paint it on neat with a paintbrush.
Making Our Door:
Now we clamp our door skin and door frame together and hammer the flange flat against the door frame using a panel beaters dolly and pick and finishing hammer, or a flat weight and suitable hammer.
The corners of our door skin at the moment are open like peep toed shoes. Putting a weight diagonally across the inside of the corner on the door frame and about 5mm from the apex we must strike the corner of the door skin with a flat hammer curling the corner upwards. Keep striking the corner rolling the point upwards and over onto itself. Finally, change the position of the weight onto the door skin hammering the turned over point onto itself. We have folded the corner over sealing the corner. Hammer it flat. Without taking off too much metal we can grind the corner with our angle grinder until we achieve a slightly rounded shape.
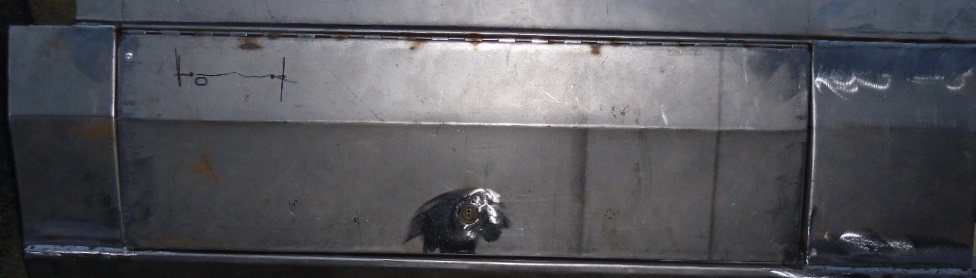
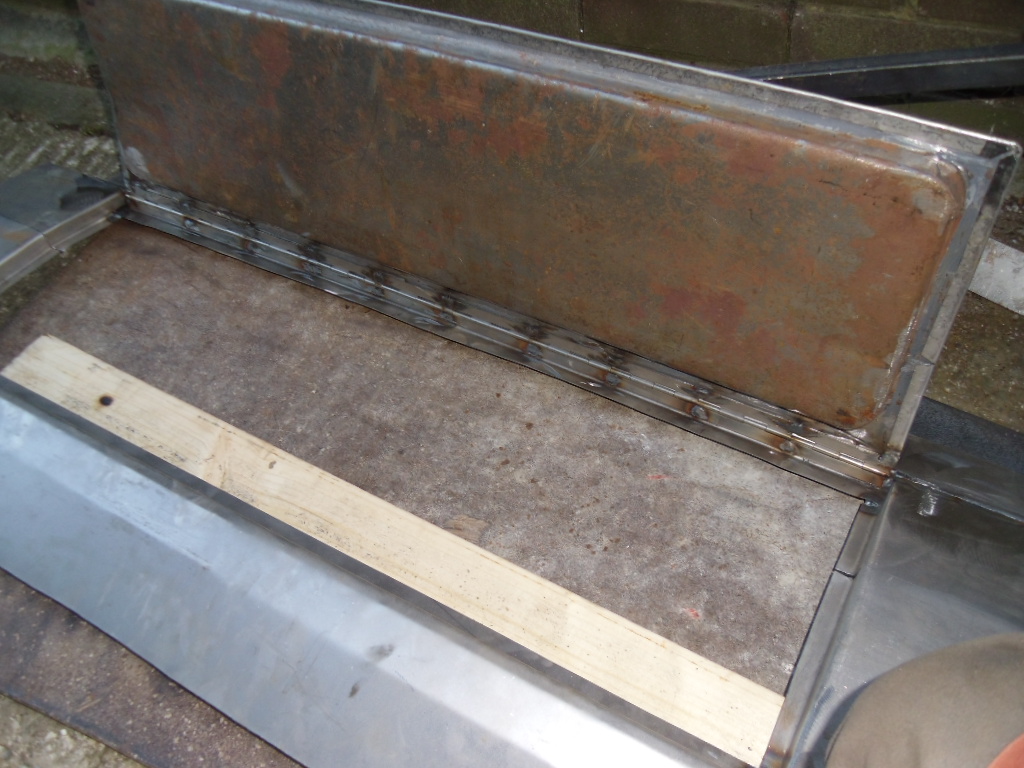
When we have finished our door should look like this:
Now we’ve finished the easy bit we’ve got to fit the lock, weld on the hinge, fit nutserts(if we’ve got the tools) for the lock and repeater lamp and make the surround for the door.
Fitting the Lock:
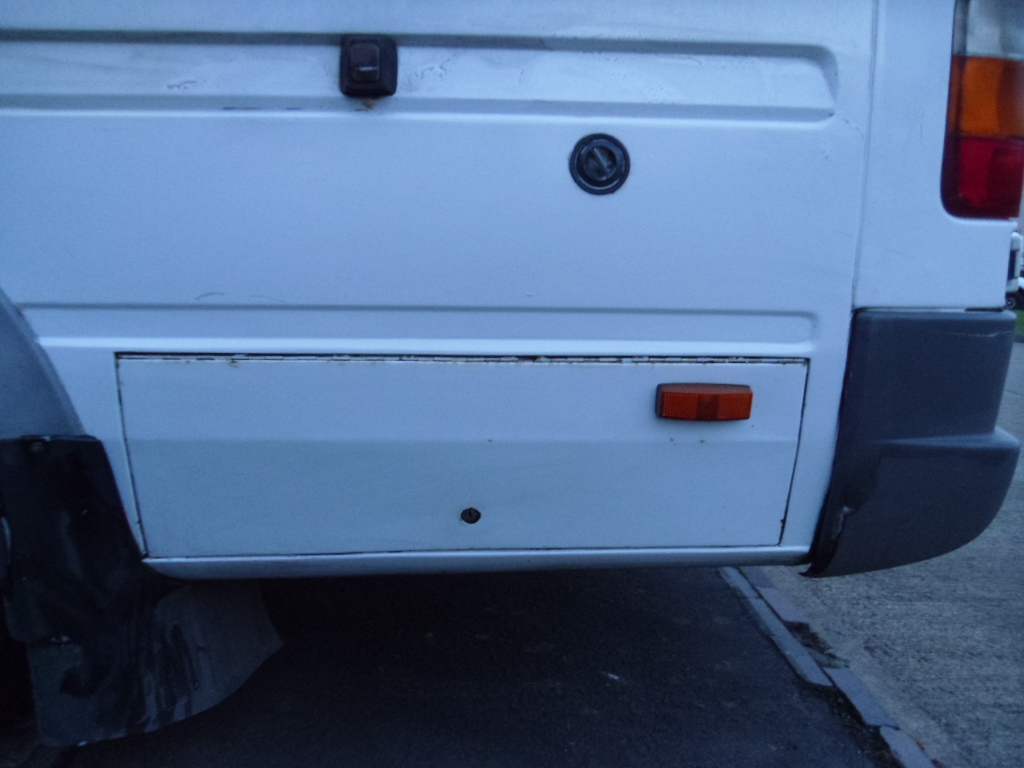
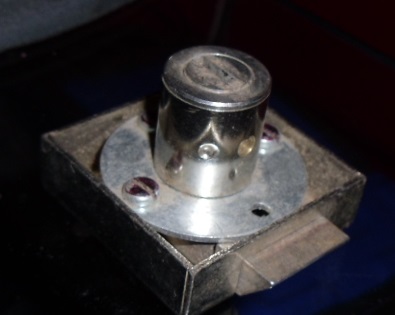
Fitting the lock: I wanted my lock to fit along the bottom of the door with the hinge at the top. This has the advantage that should the lock fail the door will open and hang vertically downwards only sticking out a couple of centimetres. If you look at the picture below showing the finished door, you’ll see what I mean. Now you’ll also see that we have the panel above the door to which we fit the hinged door, the sill below the door, and the left and right panels. We’ll come back to these one at a time after we’ve fitted the lock.
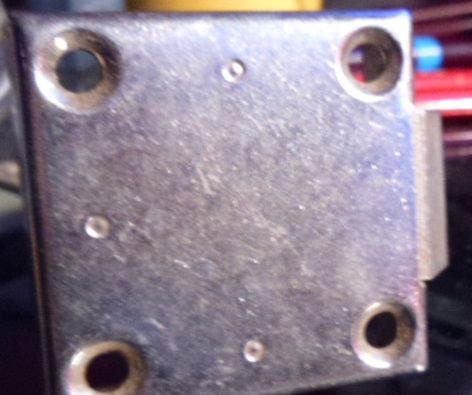
Let’s look at the other side of my lock. We can see that it has apertures for four retaining bolts so I have two choices. I can use long self tapping screw to fix it to the door frame or I can use 6mm threaded inserts called nutserts with countersunk 6mm bolts. I prefer the latter option. It’s neater and stronger.
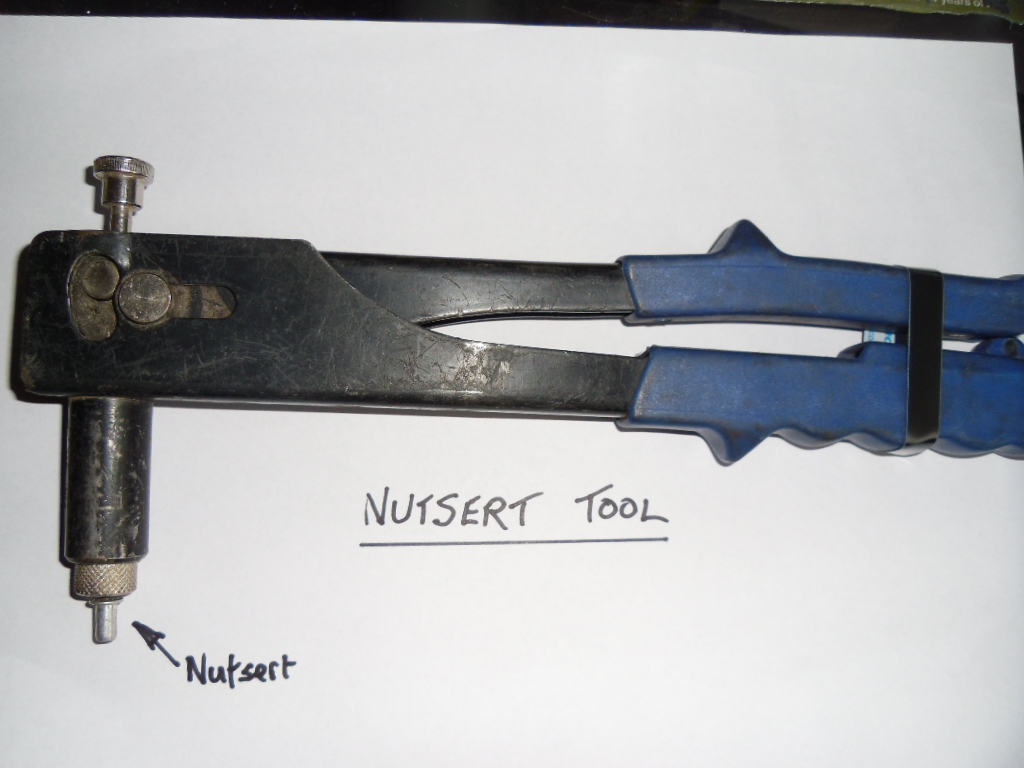
The Nutsert Tool:
You can buy the Nutsert tool and inserts from most good quality automotive tool shops. Drill the correct size hole, fit the nutsert to the tool insert in the hole and operate it like a pop riveter.
Carry on Fitting The Lock:
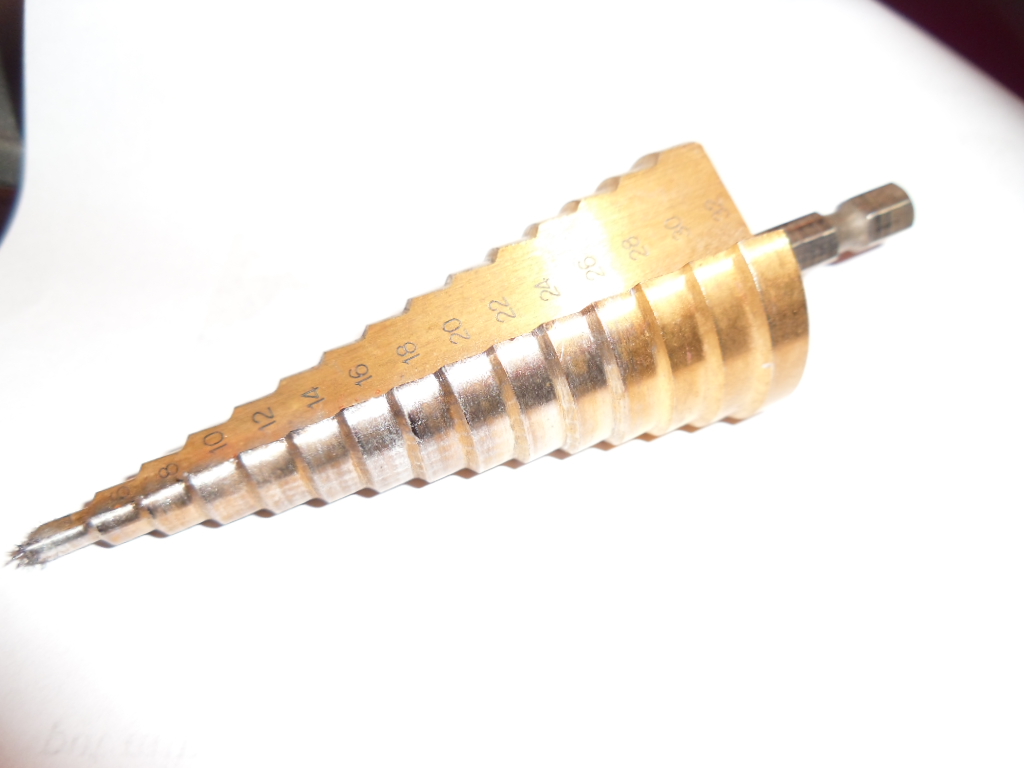
Before we can fit the lock we must decide where it’s going to go. Once decided, we have to drill a hole for the lock barrel. I prefer to use a stepped hole cutter that can cut holes from 4mm to 32mm in sheet steel. If you can’t find one – e bay!
The barrel size on my lock was 21mm in diameter so I cut a 22mm hole in the inner door frame. If you are extremely careful to cut with the hole cutter vertical, because of its length it will start to cut the hole in the outer skin as well. Once you have cut the correct size hole in the inner door frame turn the door over and finish cutting the hole in the door skin. Before you do any more put the lock in the door and bolt/screw it in position. Turn the door over. Look at the position of the barrel in relation to the hole in the door skin. Is it central in the hole? If it’s not you didn’t drill the hole vertically. Never mind, mark a circle with the barrel in the centre, take the lock out, and file the hole to the correct shape.
Next we make a tube of 20 gauge steel to fit around the barrel or if you’ve got some tubing that will fit so much the better. Wrap the steel around the barrel and carefully cut to size for a sliding fit. Tack weld it, remove the barrel and weld the two long edges together. File the inner welded edge clean.
Refit the lock and slide the tube you made on to the barrel. Tap it down as far as it will go. Grind off any surplus. Put the key in the barrel to prevent spatter from entering the lock and tack weld the sleeve into position. Remove the lock and tack weld the sleeve at the other end. Put the lock back in and operate the latch. If it operates smoothly, remove the lock and finish welding, if it jams something is too tight or twisted. Fix it before you weld. Grind both welded surfaces to give a clean finish.
Making The Adjacent Panels:
Now we have to make the adjacent panels. First of all the top one with the hinge. If we look at the first picture you’ll notice the hinge sits below a natural swage in the body panel. The van has been designed in such a way that this channel is in line with the van floor which sits against the top half of the channel.
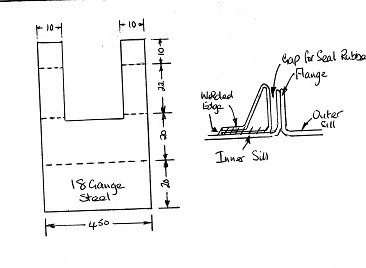
The most important consideration, when deciding on the flanges around the locker door, is deciding what sort of seal you are going to use. A company that has been around for many years, indeed I used to purchase seals from them back in 1970, is called Baines Extrusions. They’re on the internet www.coh-baines.co.uk if you can’t get the right one from Halfords, Amazon, Machine Mart etc. I decided on one that interfered the least with the way I wanted my door to operate. This involved me making a flange parallel with my door skin and only taking up a 15mm width of flange.
The first consideration is the door gap. Usually about 5mm maximum. The folding machine I had the use of had the minimum depth of 20mm for a stepped flange. This was a good size for my door seal
However, the first thing I make before I start is a ‘folding template’. This is a narrow strip (20mm) of steel folded in the way I want my final panel to be folded. This means I can attach a small piece of rubber seal to it and hold it against the door. I can physically see the compression of the rubber seal against the door whilst maintaining my door gap and panel line. In the case of the hinge panel this required more thought as the hardest part could not be folded in the Folding Machine.
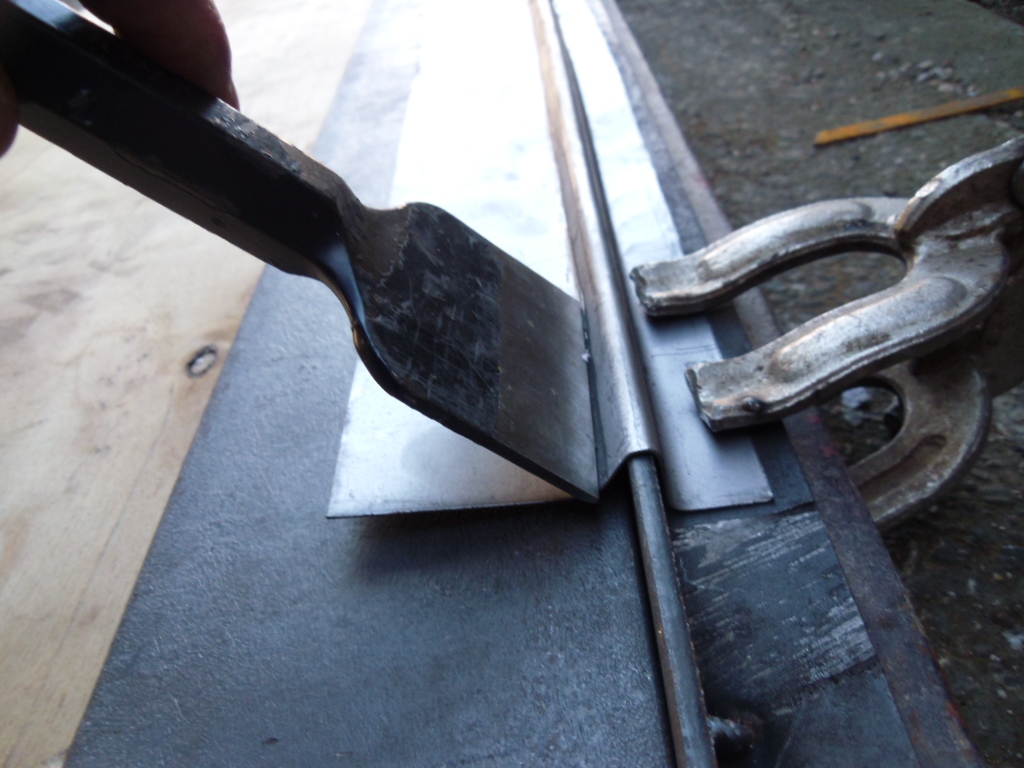
I therefore utilised some flat bar, a sheet of quarter plate, welding cramps, and a plumbers bolster(large flat chisel). The stepped panel was produced in the machine at a suitable length. It was then clamped to my impromptu jig, packed up with a further steel sheet and a length of ply(I have no shame) and duly hit with a hammer and bolster.
It actually made quite a passable panel.
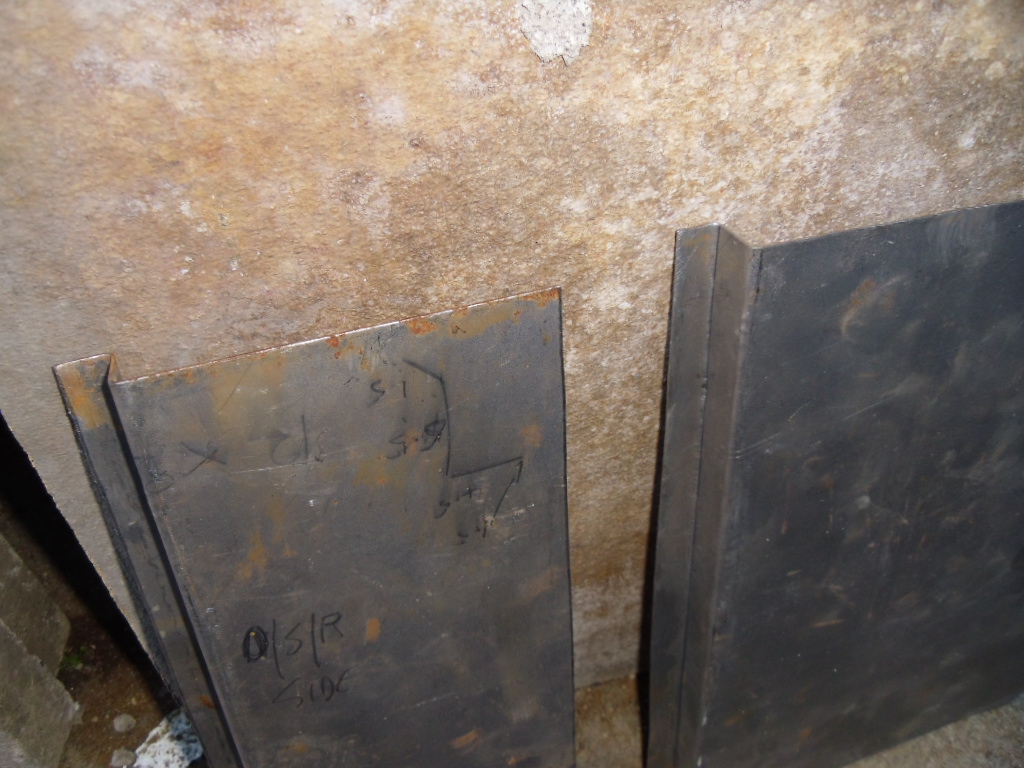
The two side panels had to be made according to sizes dictated by the existing wheel arch and the adjacent rear bumper. They were straightforward stepped panels.
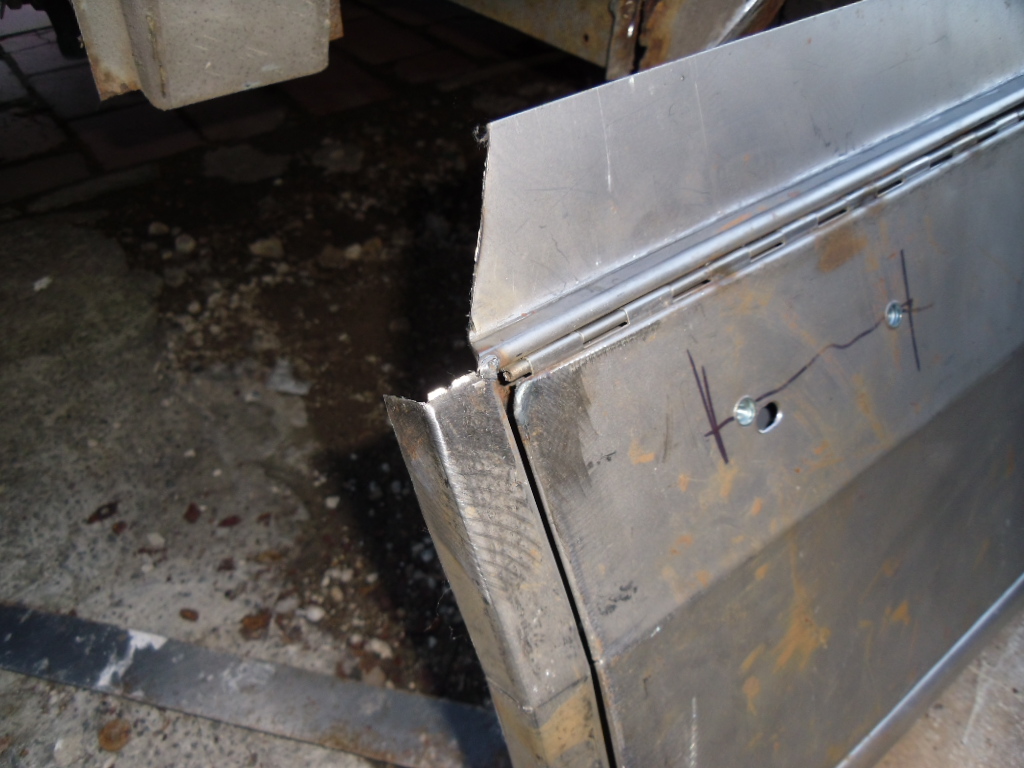
The stainless hinge had 15mm flanges and before I plug welded it to the door skin I welded the crimped flange of the door skin to its frame. This is a normal panel beating practice and ensures no movement of the door skin after you ensure your panel fits square in the aperture.
The side panels having had the stepped flange were measured against the doorskin and a swage in keeping with the body line was incorporated.
At this stage the flange so cut was not welded to allow for final fitting on the vehicle.
Allowing for the 5mm panel gap the side panels were welded to the upper panel in the appropriate place.
The sill panel was folded keeping to the template and following body lines and was then welded to the side panels.
Across the corners where the flanges meet, triangular patches are then welded in and shaped as a quadrant. This is to carry the rubber seal neatly around the corner.
Starting On The Vehicle:
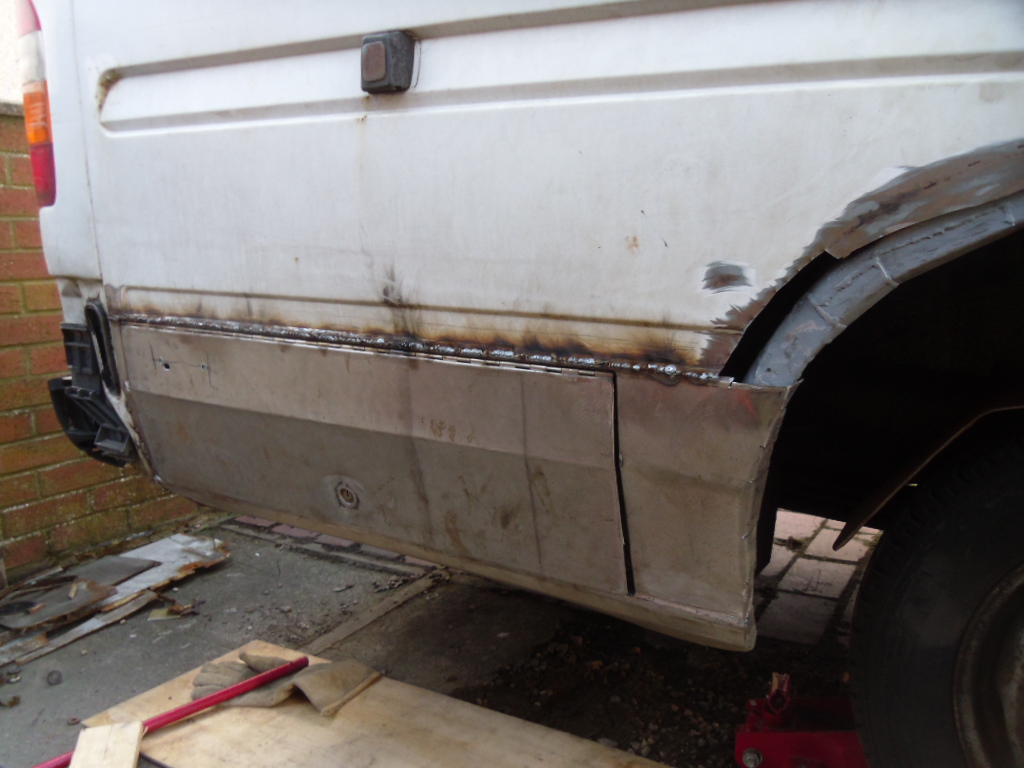
Now we’ve got some sort of hatch we’ve got to start on the vehicle. This is where we have to be brave and start hacking to pieces, in most cases, a perfectly serviceable vehicle. In my case my vehicle was quite corroded, and, with an MOT imminent, I had to decide whether to carry out the basic rust removal, or go the whole hog and finish off a job I’d started a few years ago. The whole hog it was then.
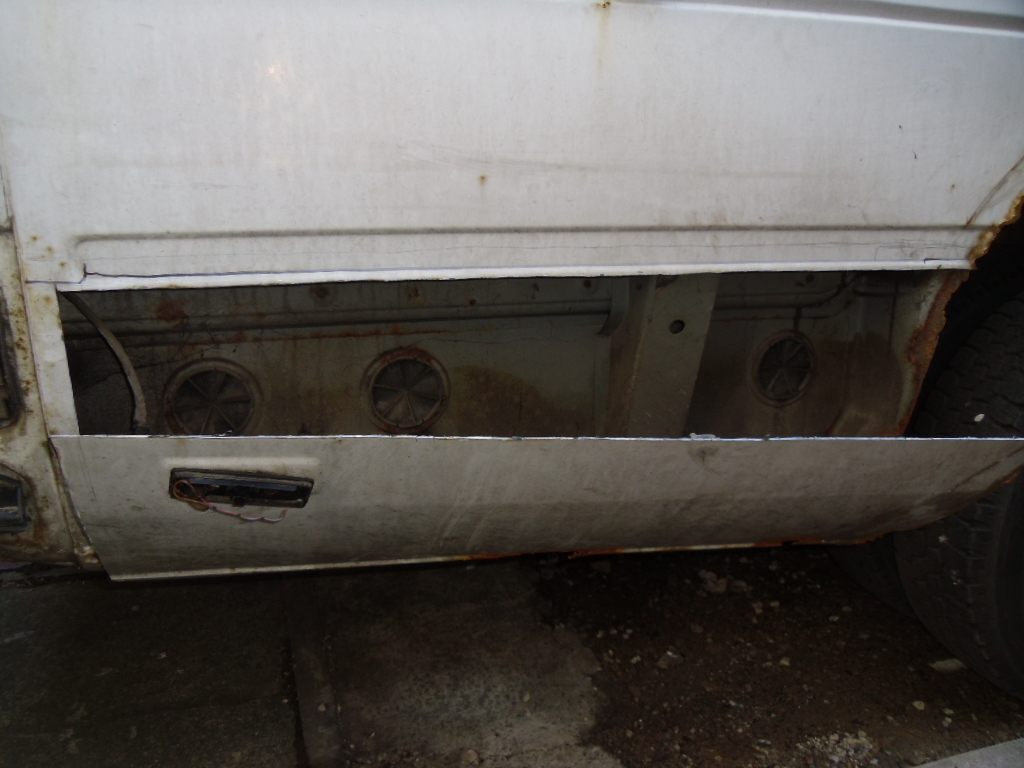
You remember the felt tip line we put on the vehicle when we started, well now we get out our angle grinder and, with a nice thin cutting wheel on it , cut out the bit in the middle:
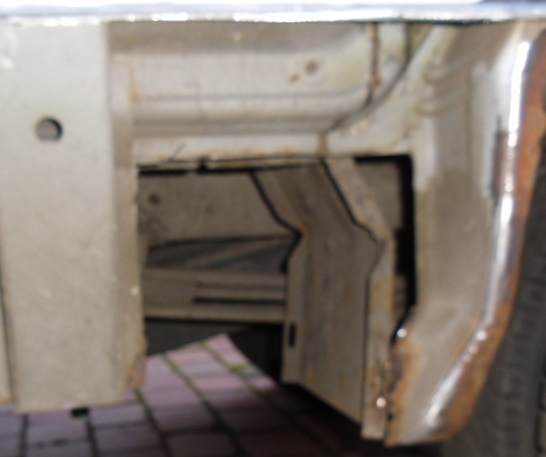
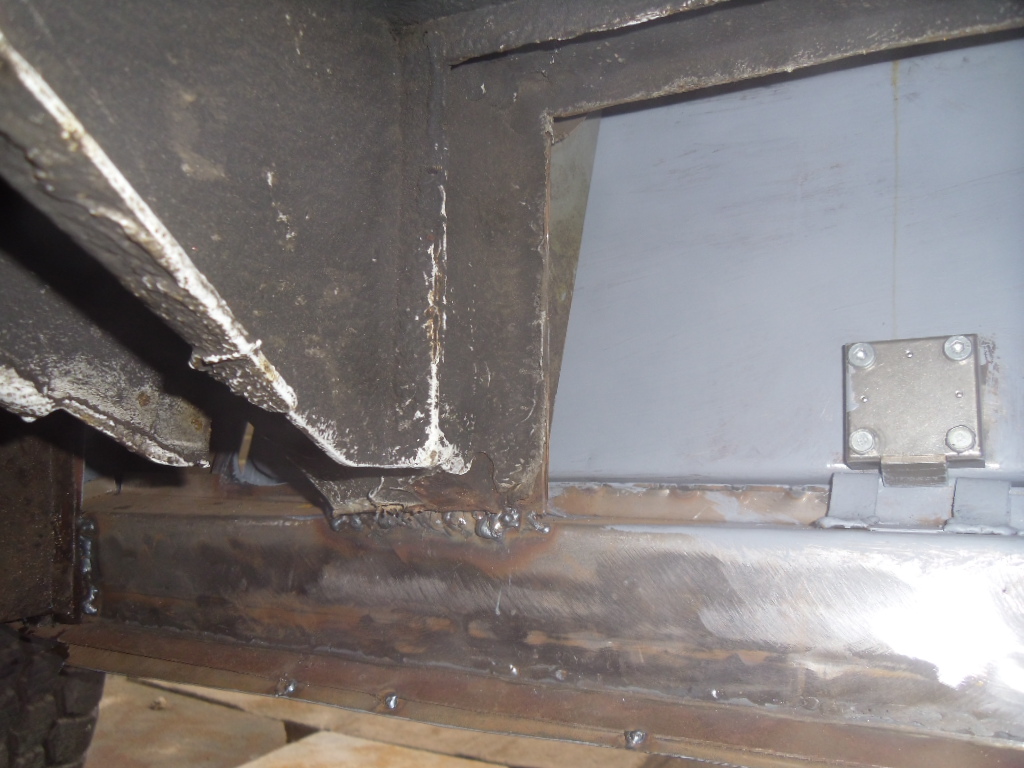
So far so good. Cut out the entire panel, gently removing the repeater lamp in this case. Now check the corrosion revealed and cut off the inner panels we will not need inside our locker;
You notice the old exhaust bracket top centre left. We can cut this off now as it is no longer needed. Look at the chassis outrigger. We must not remove this as it is a structural member and we will use this when we recreate a modified inner sill. The space to the right of the outrigger can also be quite useful and it will be accessible through the hatch. We will fit a cover panel from the edge of the splash guard to the wheel arch and we will be welding the new inner sill to both the wheel arch and outrigger.
Now we have to start to make our locker hatch and surrounding panels fit the hole we have cut.
We offer up the assembly to the vehicle and decide where the hatch is to fit. Whilst I have made this assembly to fit a Mercedes Sprinter should you be fitting it to a different vehicle your preferences will vary.
Here we’ve shaped the left side panel to correspond with the shape of the original. This will butt up against the wrap around corner panel.
We don’t weld the seam on the bend as the final shaping still needs to be done. As I’ve decided where and how I’m going to weld the whole panel, I cut the panel along the fold I made with the bolster. I hold it in position, clamp it, and then weld the top edge.
Because of the panel’s proximity to the inner floor of the vehicle it is essential to ensure there is no combustible material inside the vehicle adjacent to the weld. A fire watcher (the wife!!) with a suitable extinguisher should be positioned inside the vehicle whilst welding is in progress. Also it is well worth remembering that no welding is carried out in a professional bodyshop within 30 minutes of closing time so that if a fire is smouldering it will probably ignite whilst someone is available to put it out.
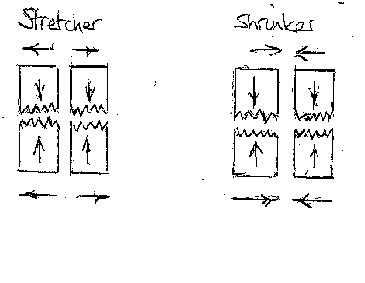
Whilst it is not part of this article to show how my rusty wheel arches were dealt with, you cannot fail to notice that repairs have been carried out prior to panel fitment. There are three ways to repair double curvature wheel arches. One is with a shrinker and a stretcherfrom Eastwood Tools. This is a very good tool that works by compressing the metal of a flange and making it longer or shorter. This has the effect of bending the opposite flange. It works using four hardened steel jaws that press and grip the flange and either move outward, thus stretching the flange or inward shrinking it.
Another way is to use a cross pein hammer and a weight, striking the flange across its width with the chisel edge stretching the flange.
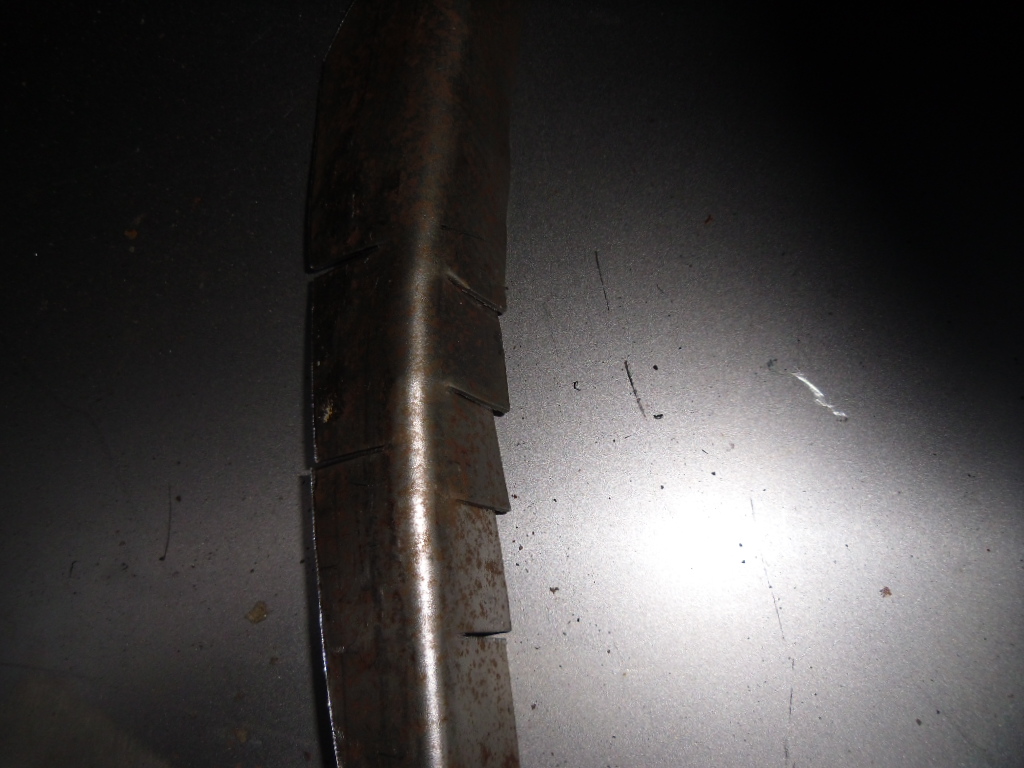
The simplest, cheapest and quickest method is to make a series of cuts at right angles to the edge of the flanges bending the flange to whatever shape is required as shown in the picture below. When the correct shape has been achieved the surplus overlapping metal is removed and the flange welded in position. The more cuts are made the neater the flange.
Once the inner flange is satisfactory the outer can then be repaired.
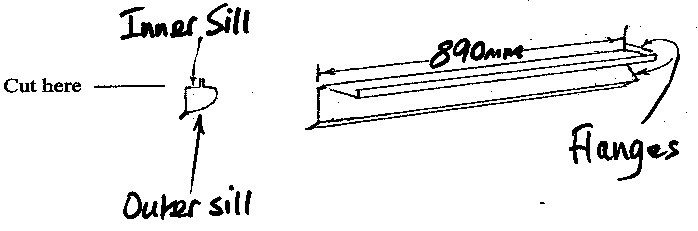
Make an inner sill in 18 gauge steel as per the shape below. Whilst the length on my Sprinter was 890mm, length and shape will vary slightly with make and long wheel/short wheel base versions.
Before fitting the inner sill it is necessary to clamp the bottom edges of the lower outer sill to the inner wing at the front and the rear corner flange at the rear and then measure across from the bottom edge of the topmost flange in the hatch aperture to the lower edge of the original chassis outrigger. Cut the outrigger horizontally at this level as shown in the diagram above.
Fit the inner sill in position, clamp, check the panel fit, and weld .
Shape to the wheel arch in the same way I described above by cutting at right angles and folding against the existing wheel arch. Weld to the wheel arch by either edge welding, fusion welding with oxyacetylene, spot welding, tig welding, or plug welding.
Now we have to fit the rubber seal to the aperture. Once done we can look at the lock and see where the catch is to be fitted to ensure a good panel fit.
Making and Fitting The Lock Catch;
It is important to ensure that the lock catch doesn’t move with extended use. It must be extremely durable and strong. If you copy my drawing to a sheet of 18 gauge steel, cut out and fold on the dotted lines. Adjust height as necessary for your choice of lock and weld in position.
Fitting The Repeater Lamp:
On the outside of the locker door where the repeater lamp is to go drill two 9.5mm holes and fit two 6mm nutserts where the original screws were and then make an oval hole for a grommet through which the wiring passes. This wiring also passes through the door frame directly opposite and you should drill an appropriately sized hole not just for the wiring but for a suitable wiring grommet.
And Finally:
Clean up and wire brush all welded areas before applying body filler. All areas not to be refinished immediately should be painted with Zinc primer to prevent corrosion, as I have done:
Note: All welded seams that were previously finished with polyurethane seam sealer should be resealed with the same. Areas covered with zinc primer to avoid rusting should be cleaned off prior to refinishing.
And the completed locker looks like it’s always been there:
The flowers had to go on tour as they were a Mother’s Day present!
Who am I, where did I come from and am I qualified to write this blog?
Well, at the moment, I’m nearly 72, retired and living in the North of England.
It all started back in 1947 in Plymouth, born to a hard working married couple. I left home at 15 years old and joined the Army as a boy soldier in the Royal Electrical and Mechanical Engineers. It was the best thing I ever did.
I was able to finish off my basic education, scuba dive, climb mountains, hike impossible distances accurately, play rugby and athletics at county level, gymnastics, play musical instruments in the Corps of Drums, find out about girls, and, in general, have a wonderful time.
One of my first postings was to Operation Crown in Thailand as a clerk. This was my first introduction to vehicles and where I learned to operate and drive a myriad of construction vehicles and plant. This was a love affair I would build on throughout my 15 year military career.
I left the Army in 1977, conduct “Exemplary”, having been trained as a Clerk, learned how to drive and mechanically repair a host of different vehicles, including tanks and armoured cars, and having achieved and relinquished the rank of sergeant (for love). They also taught me how to be a welder on my resettlement course.
I had achieved a good educational standard and believed I was well fitted for the outside world. I couldn’t have been more wrong.
Charlie Farrington was an artisan of the old school. There seemed to be nothing he didn’t know something about. He was a skilled painter and decorator, builder, chippie, plumber, plasterer, panel beater, car sprayer, in fact, jack of all trades and master of many and a man who had taken me under his wing to train me in my new career as a panel beater and sprayer. Why would he do that you might ask? To make sure his new son-in-law would be financially able to look after his daughter and their new son Alexander!! that’s why.
He was a hard taskmaster and the next few years were difficult. I was on apprentice wages in London and it was a struggle, but as they say, “the only way is up”. I learned how to be a competant panel beater and sprayer, working on Ford Cortinas for Wimpy Hamburgers Head Office, Lancia Stratos’ and other sports cars for Chequered Flag Motors, Ferraris for Fax Dunn(Marinellos London Works), Daimler Limousines for J. C. Leat, Rolls Royce and Bentley for Paddons of Knightsbridge, British Leyland luxury cars for Leo Burnett Advertising, Aston Martins, Porsches, Minis, Ford Sierras and a host of others.
Eventually, our premises in a lowly railway arch in Stamford Brook became too expensive and small for the amount of work we had coming in. We moved to a larger premises in Farm Road, Fulham, where a chance encounter with an old army mate would change our fortunes.
My job had now become sort of managerish. With my clerical experience in the army I had become the one who sought out the work and brought it through the door, doing a lot of the estimating and paperwork as well as working on the shop floor when required. One day whilst strolling along Chiswick High Road I bumped into an old army mate, Wally Wotton whom I’d served with in Thailand and Lybia. After shaking hands and asking after each other he asked me where I was working. On being told he said, “You’ll be getting our work then”. It turned out he was the workshop foreman for Frank Dale and Stepsons, Rolls Royce Dealers!!! We would be eternally grateful to him.
Within days, as well as dealing with our established customers we had a whole host of exotic vehicles in our workshop.
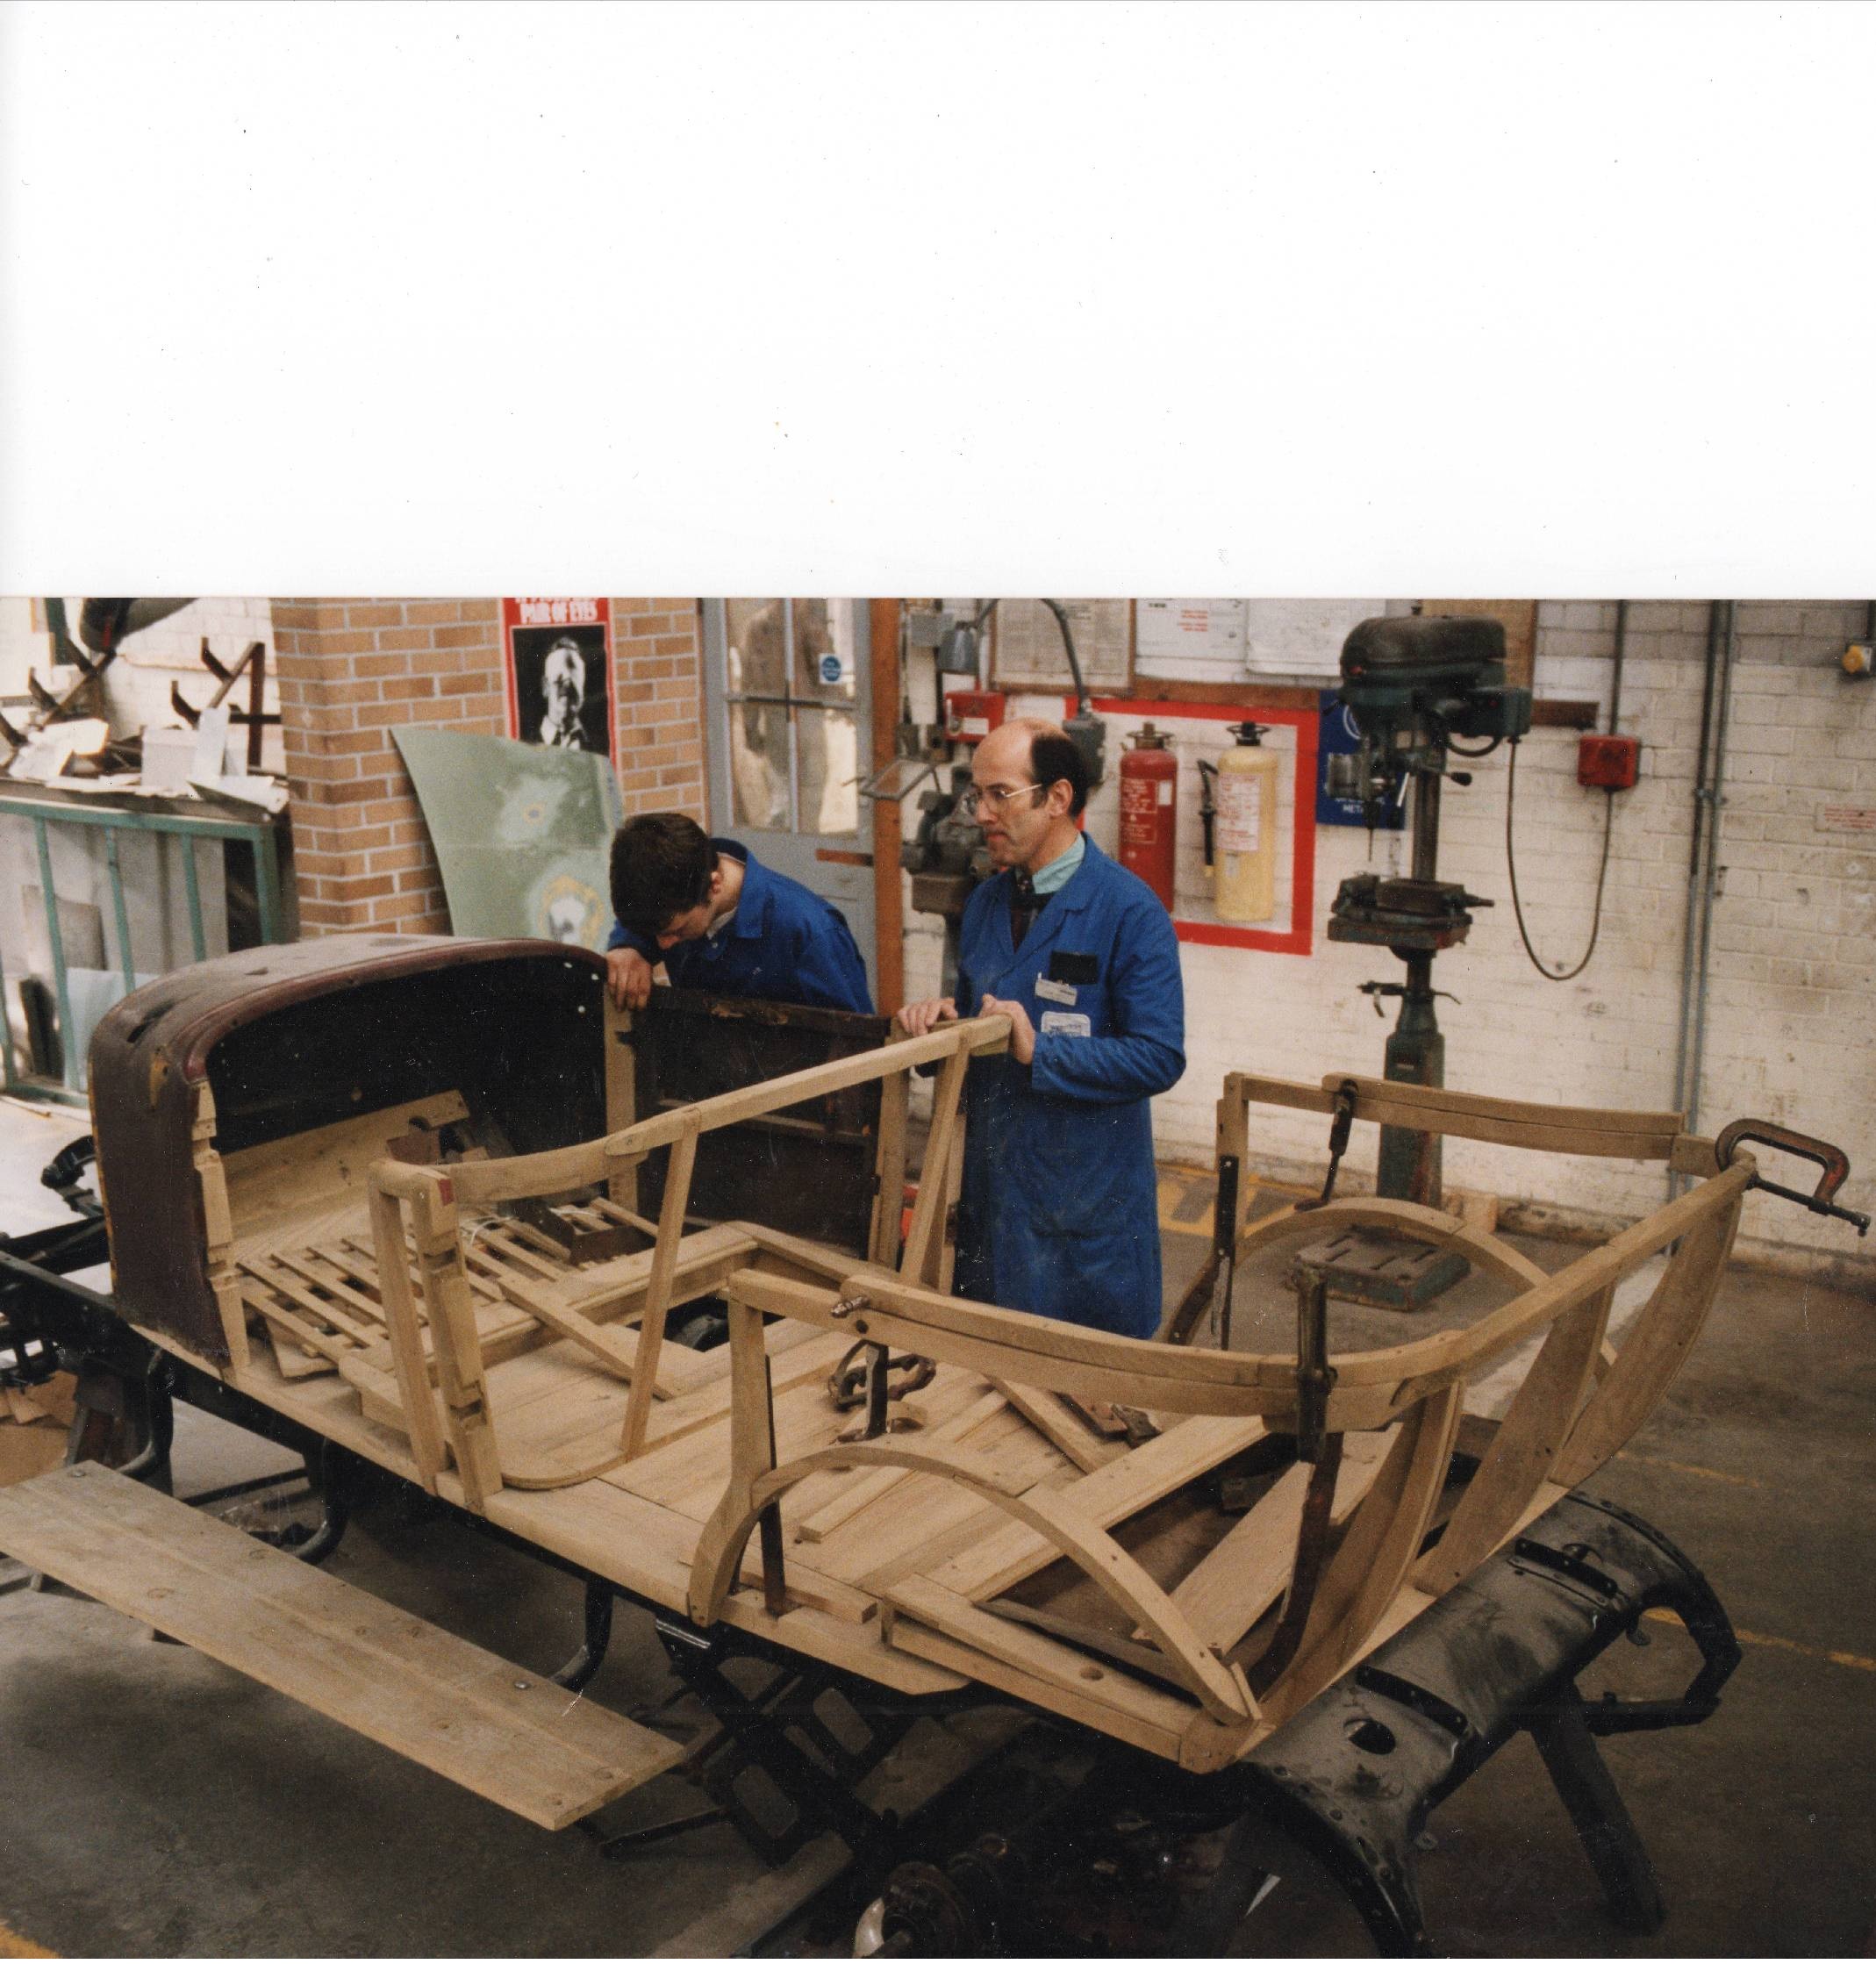
Thanks to Charlie and Mel, we also had the necessary skills to deal with this type of work. As we were dealing with sometimes vintage and veteran Rolls Royces, Bentleys and other exotica, there was a lot of aluminium and steel fabrication, fusion welding, ash framing and lead loading to be done.
In my capacity as Estimator and Manager I sometimes had to calculate the cost of trimming the interior of vehicles. Frank Dale & Stepsons, in the interests of reliable quality, used the services of a superb local trimmers called “Strong and Turton”. I spent a few hours each week in their workshop, learning just what it took, and what it cost, to trim a vehicle.
Working in this environment took its toll. I was working 80 – 90 hours a week, only seeing my family on Sundays. My married life suffered.
We decided to move to Plymouth in 1984 in search of a better quality of life for our growing family, but it meant starting again at the bottom.
From 1984 until 1987 I worked for a host of different bodyshops – Ford, Mercedes, GM, BMW, Volvo, always moving on for a better salary and working conditions. I became conversant with most of the body jigs and spray booths on the market and carried out car body repairs to the high standards required by the motor industry.
In 1987 I moved back into management, designing, helping to develop, and subsequently running the Mazda Bodyshop in Plymouth. I obtained the Police contract amongst others and the General Accident Motorcycle repairs – this involved plastic welding and Pearlcoat applications.
After the demise of the Mazda Franchise, I was asked by the Ford Main Dealer in Newton Abbot to help their failing bodyshop. After six successful months there I’d had enough of commuting and started my own restoration workshop in my home town of Plymouth. A year later I was headhunted by Astra Training Services to run their Body Repair and Spray painting department. As my lease was about to expire without renewal I was happy to move into a less stressful environment (yeah right!!)
I entered the training environment at a time of change. City and Guilds qualifications were going to become National Vocational Qualifications(NVQs). As I had neither I was required to take the then only qualification for Panel Beating and Spraying, City and Guilds 385. On successful completion I was then required to take C&G 7281(Training and Development) which had the sub units D32 – Skills Assessor, D33 – Vocational Assessor, D34 – Internal Verifier, andD36 – APL Advisor(Accreditation of Prior Learning). With these qualifications I was then able to teach any subject I had a recognised qualification in. I then obtained NVQ’s at Welding Level 2(Q1011122) and Engineering Level 2(Q1013557). While I was at it I also obtained the NEBOSH – National General Certificate qualifications, CLAIT(Computer Literacy and Information Technology) Level 1, Grinding Wheels , and Paintless Dent Removal.
I also had the privilege of writing the then new NVQs for Body Repair and Spray Painting from the Lead Body Standards(IMI) and assisting City and Guilds Institute in their compilation.
At the same time as this was going on I was teaching unemployed men and women how to become successful, qualified, panel beaters and sprayers. I also had the satisfaction of teaching Marine Projects/Princess Yachts(based in Plymouth) apprentices the basics of Fibreglass techniques, British Aerospace technicians the complexities of accurately applying conformal coatings to printed circuit boards, and British Telecoms employees how to spray satellite dishes at Goonhilly Satellite Earth Station(a slight exaggeration, sorry British Telecoms). I was also the COSHH officer, Health and Safety Officer, Disability Employment Officer, and subsequently Employment Officer and Placement Officer.
Whilst this was going on I was making replacement panels for MGs, Jaguars, Fiat X19s, Morris Oxfords, Porsches, Bentleys, Ford Consuls and many others at home using jig techniques that I will share with you later in my blog.
Guess what, I left there due to an unacceptable change to my terms and conditions, and also because I was back up to the old 90 hours a week thing, only seeing my family at weekends.
Since leaving the training industry I made a catering trailer for my wife, a tipping, extendable trailer for me, worked as a Commercial vehicle fitter, built a Mercedes Sprinter Camper, worked as a central heating engineer and general handyman and subsequently moved to France to work at self sufficiency with my wife of many years.
Do I have the skills and experience to write this blog and answer your queries? I hope so. Charlie is no longer with us to back me up but hopefully I have his legacy in my head with other things I’ve picked up along the way.
I shall be writing about:
Basic toolkits for pennies (cents, centimes etc)
Basic Skills for Panel Beating
An introduction to spray painting including compressors
How do I make my repairs look professional
Advanced(ish) panel beating
Air Tools
Basic jigs and how to make my own
How to make a Landrover rear floor
How to make replacement floor pans
How to make a folding machine for sheet metal
How to make a lead press
Welding techniques in oxyacetylene
Arc Welders
Mig Welders and how to use them
Tig Welders
How to make a multi purpose 2 ton extendable car and tipping trailer for under £500
Advanced spray painting
Making a Van/Camper Side Locker
Solar Panels, Inverters and associated equipment
Free camping
How to deal with prostate cancer
Should you have any questions, observations, helpful hints, similar projects that can be included in my blog please don’t hesitate to contact me. All queries will be answered in the blog and any articles that are included will be acknowledged. The above list is not exhaustive and I reserve the right to amend it or add to it as I go along.


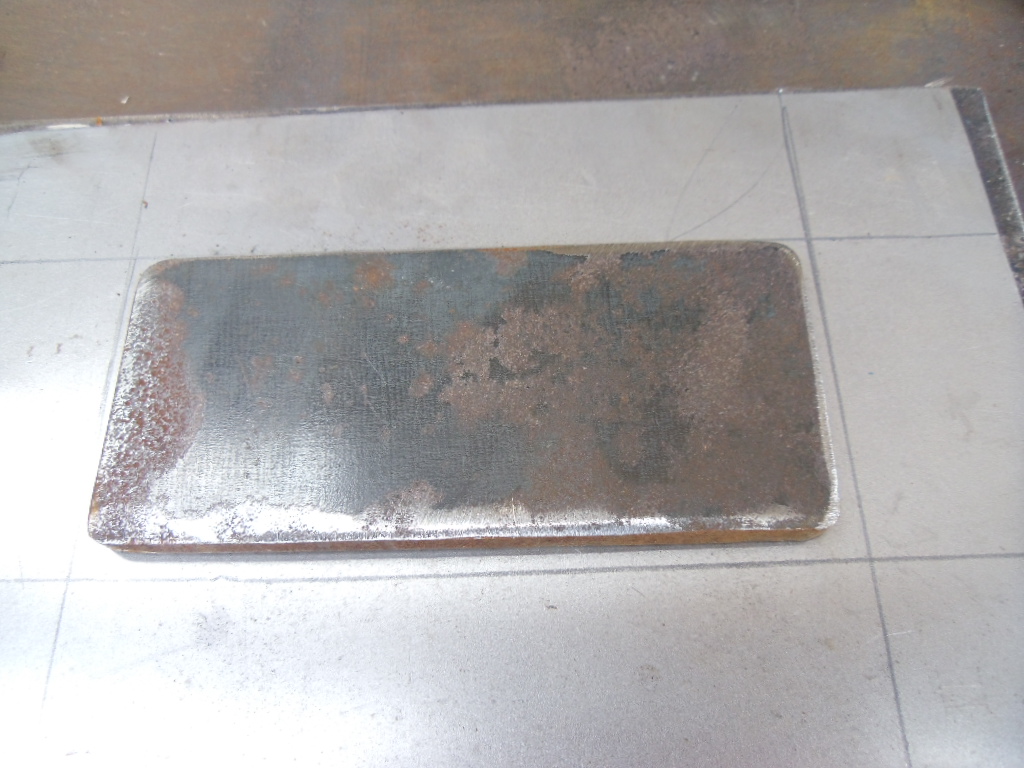 a simple rectangle of steel plate which needs to be as thick as the raised section of the panel. Fortunately my 2.5mm plate was ideal. You don’t need complicated oxy~acetylene equipment to cut the steel plate. An angle grinder fitted with a thin cutting disc will do the job just fine. Don’t forget the safety goggles and leather gloves and this might be just the time to invest in a chrome leather apron. I have seen many an expensive set of flameproof overalls ruined with the sparks from an angle grinder. Then we need to make the female part of the press tool. Note the centre punch marks to locate the male tool after the sheet is laid in position.
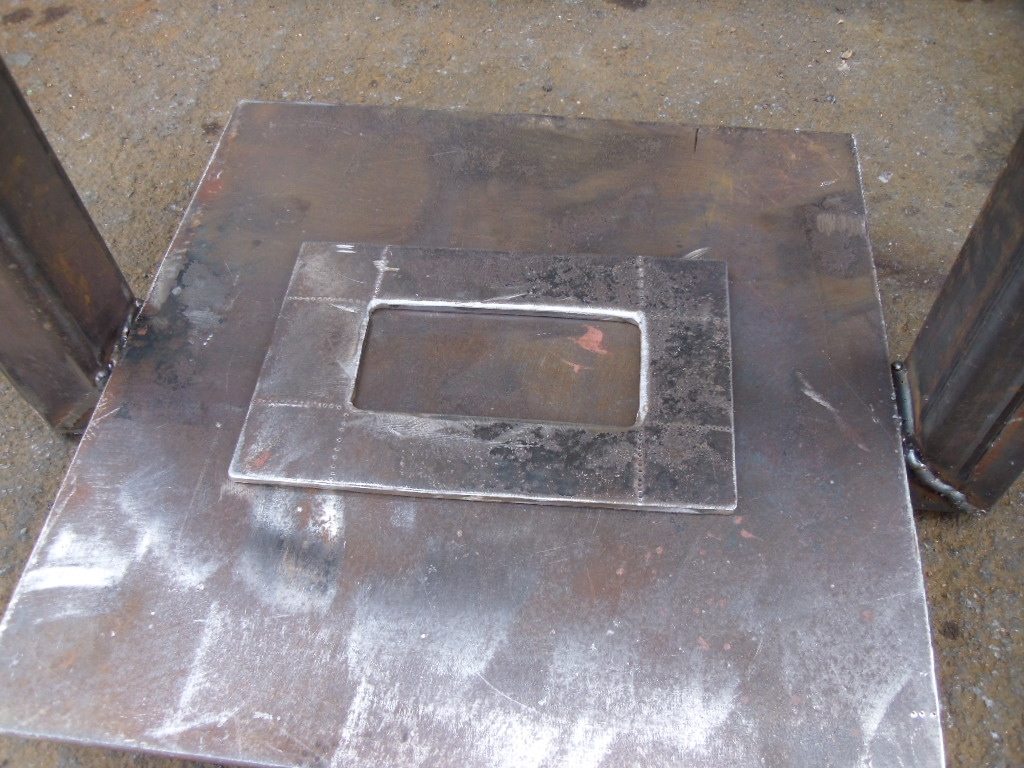
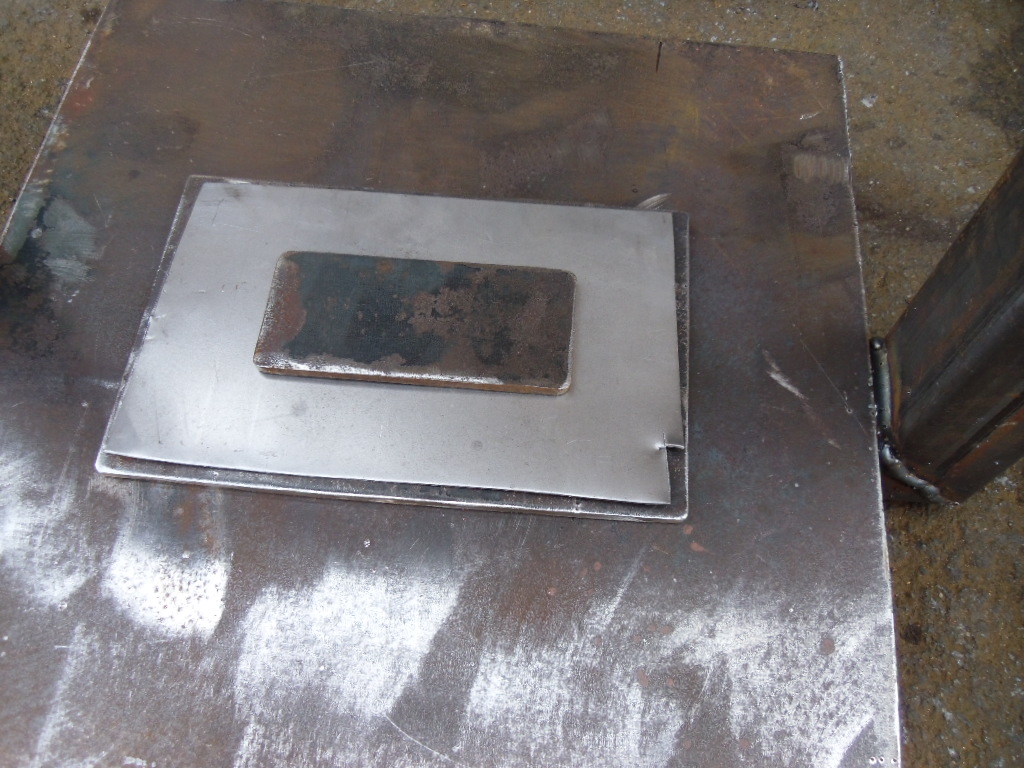 Here we have our bits laid on the working table. We then place the bottle jack with it’s base on the centre of the male part.
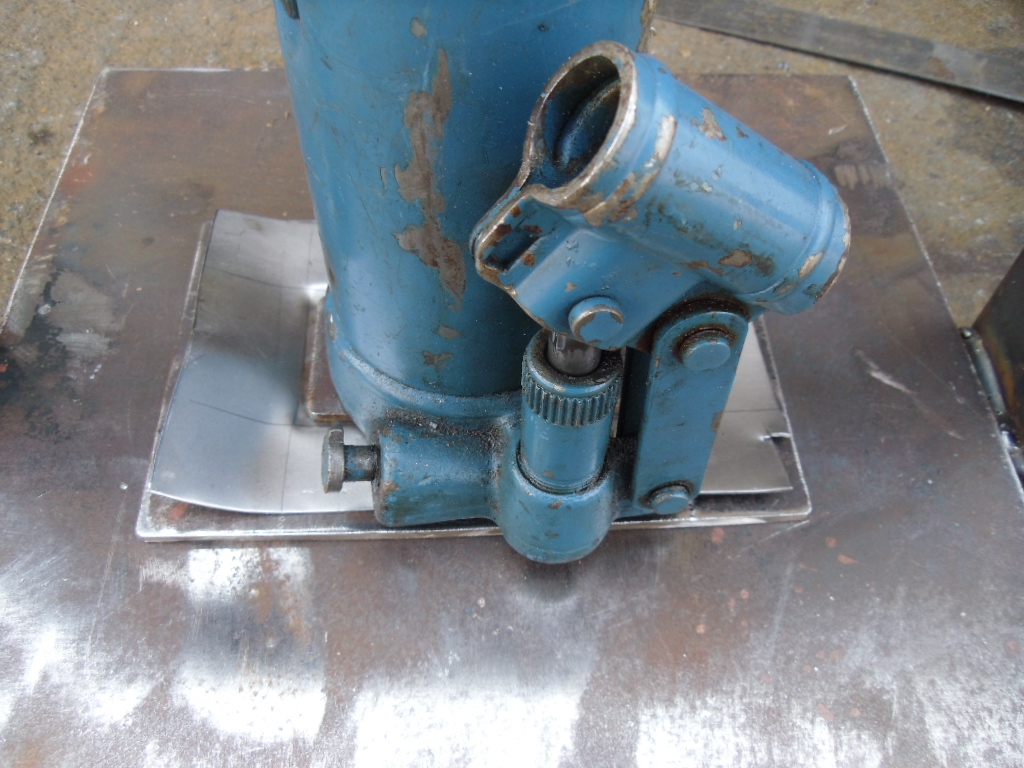
 Once the desired shaped is achieved we release the bottle jack.
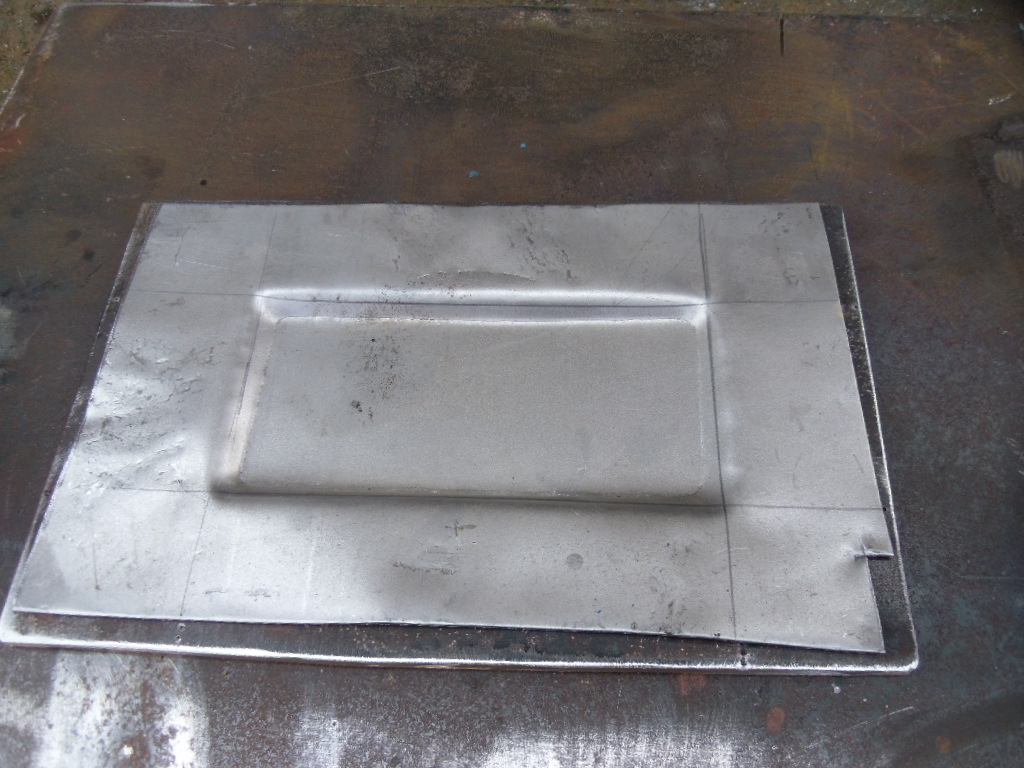
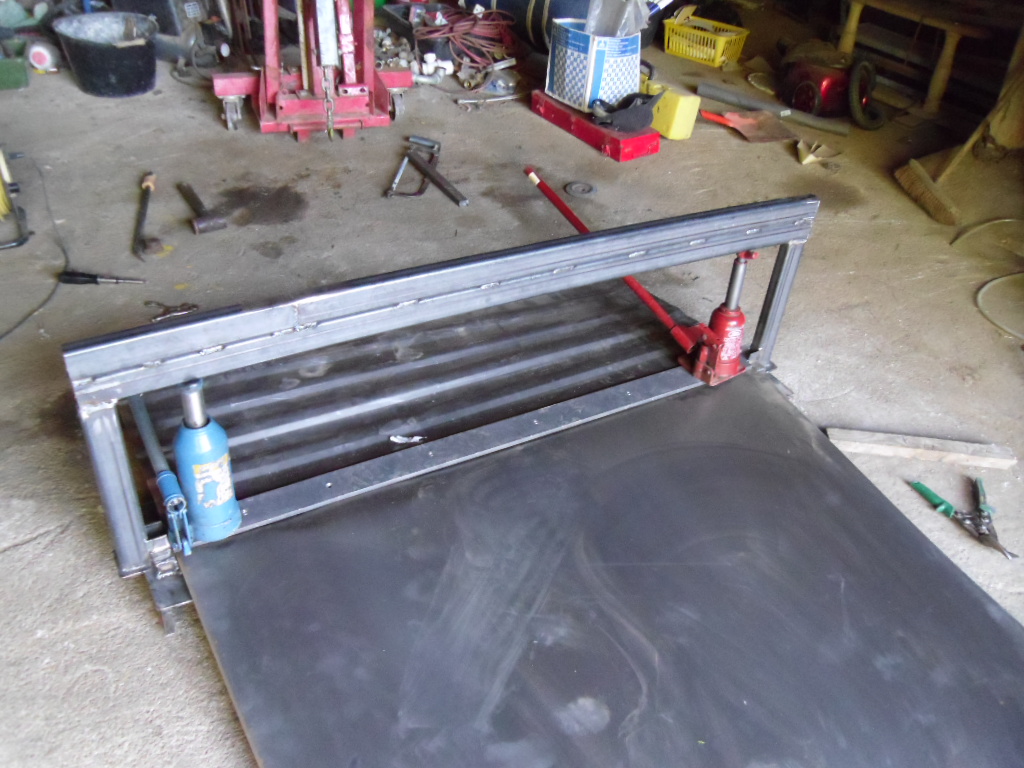 Note the reinforcing across the top of the picture frame


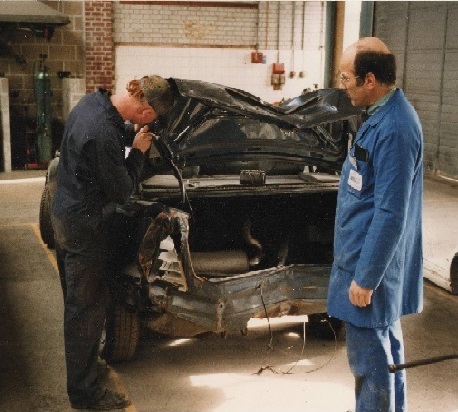
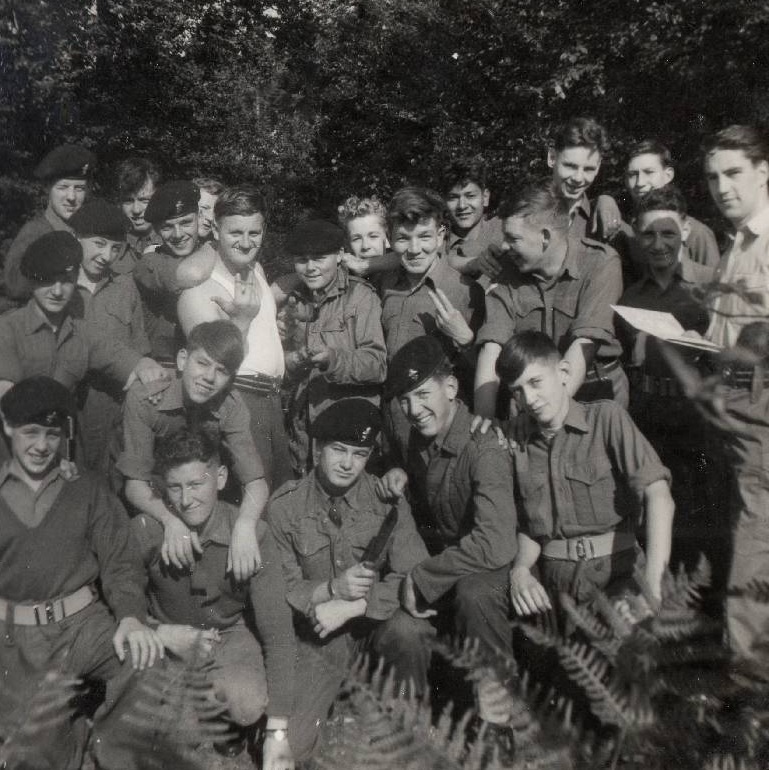 Recognise yourself here?
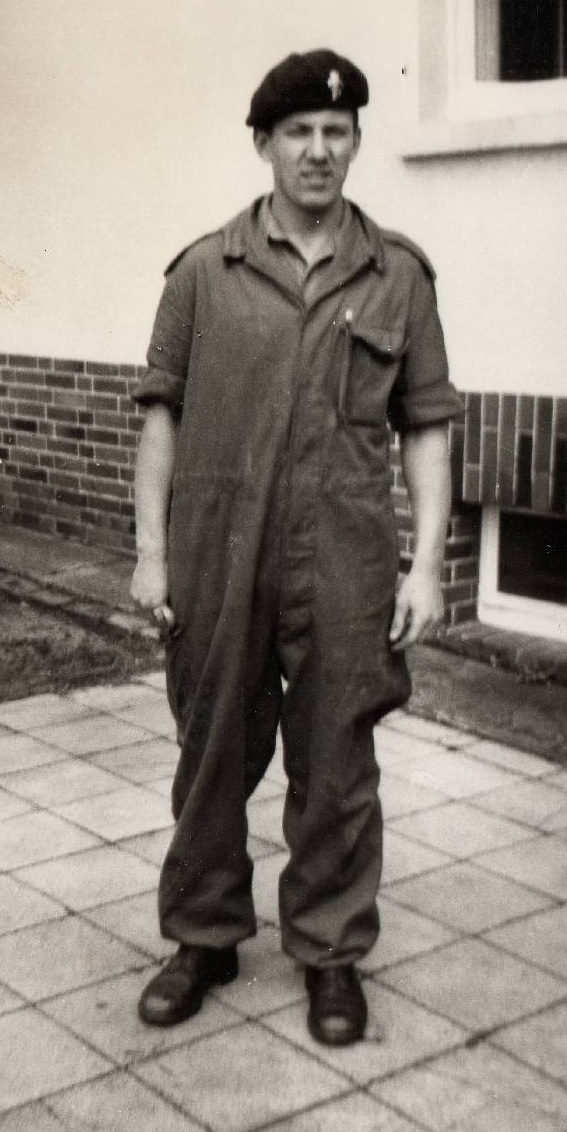
